Staring at your pantry door, knowing there’s a mountain of mystery items lurking behind it? You’re not alone. Most of us have that one cabinet where expired cans go to hide and where finding anything feels like a treasure hunt gone wrong.
The good news? You can completely transform your pantry chaos into an organized, functional space in just one day. No need for a week-long project or expensive professional organizers. With the right approach and a solid plan, you’ll have a Pinterest-worthy pantry that actually works for your daily cooking routine.
This complete guide will walk you through exactly how to declutter kitchen pantry in one day, from the initial purge to the final organized reveal. Ready to open those pantry doors with pride instead of dread?
Why Your Pantry Needs This One-Day Makeover

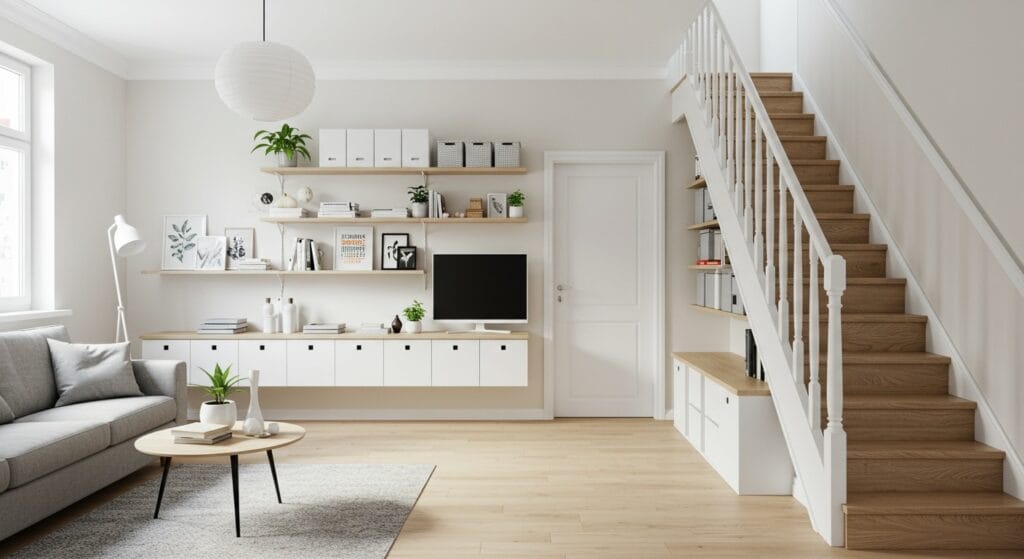
Your pantry isn’t just storage space – it’s the command center of your kitchen and dining ideas. When it’s disorganized, meal planning becomes stressful, grocery shopping turns inefficient, and you end up buying duplicates of items already buried in the back.
An organized pantry saves you time during busy weeknights. No more digging through stacks of cans or wondering if you have pasta sauce. Everything has its place, and you can see exactly what you have at a glance. The psychological benefits are equally important. A clean, organized pantry reduces kitchen stress and makes cooking feel more enjoyable. When your storage and organization ideas extend to your pantry, the whole kitchen feels more functional.
Pre-Decluttering Preparation (30 Minutes)

Before diving into the pantry itself, set yourself up for success. Clear your kitchen counters completely – you’ll need all that space for sorting items. This preparation step makes the actual decluttering process much smoother.
Gather your supplies: three large boxes or bags labeled “Keep,” “Donate,” and “Trash.” Add a fourth container for items that belong in other rooms. You’ll also need cleaning supplies, a vacuum or broom, and a notepad for your shopping list.
Choose the right timing for this project. Saturday morning works well because you’ll have energy and the whole day ahead. Avoid doing this when you’re hungry – you might be tempted to keep questionable snacks just because they look appealing in the moment.
The Complete One-Day Pantry Decluttering System
Step 1: The Total Pantry Purge (1-2 Hours)

Remove everything – and I mean everything – from your pantry. This might seem overwhelming, but seeing all your pantry contents at once is eye-opening. You’ll discover items you forgot you had and realize just how much space certain categories take up.
Group similar items together on your counters: all canned goods in one area, baking supplies in another, snacks together, and so on. This grouping makes it easier to see what you have too much of and what you might be running low on.
Don’t get distracted by organizing as you remove items. The goal here is simply to empty the space completely. You’ll have plenty of time to sort and organize once everything is out. This approach prevents you from moving items around multiple times.
Step 2: Deep Clean Your Empty Pantry (30 Minutes)

With your pantry completely empty, now’s the perfect time for a thorough cleaning. Vacuum or sweep the floor, paying attention to corners where crumbs like to hide. Wipe down all shelves with an all-purpose cleaner, working from top to bottom.
Check for any pest issues while cleaning. Look for signs of ants, pantry moths, or other unwanted visitors. If you find evidence of pests, this is the time to address it before restocking your clean pantry.
Don’t skip the door cleaning, including both sides. The inside of pantry doors often accumulates sticky fingerprints and food residue. A clean pantry door sets the tone for the organized space you’re creating.
Step 3: Sort and Purge Your Pantry Items (2-3 Hours)

Now comes the decision-making phase. Start with the easiest category – expired items go straight into the trash bag. Check every single expiration date, including items you think might still be good. When in doubt, toss it out.
Be honest about items you realistically won’t use. That exotic spice you bought for one recipe six months ago? If you haven’t touched it since, it’s time to let it go. Those pantry decluttering tips your organized friends share often center on being realistic about your actual cooking habits.
Create your “questionable” pile for items that aren’t expired but look or smell off. Trust your instincts here. Food storage organization isn’t worth risking your family’s health over a few dollars worth of questionable ingredients.
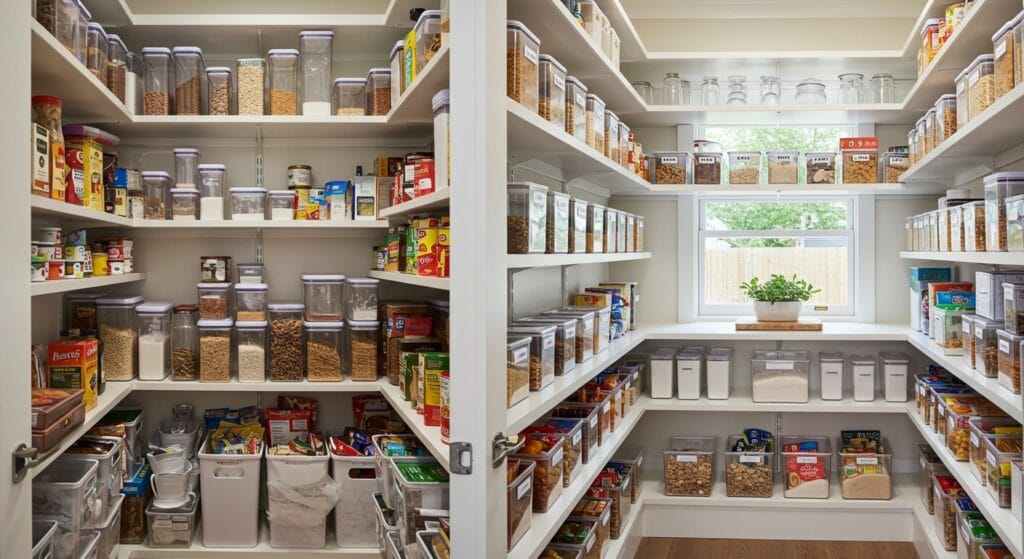
Step 4: Categorize and Plan Your Layout (45 Minutes)

Group your “keep” items into logical categories that match how you actually cook. Consider categories like breakfast items, baking supplies, canned goods, snacks, oils and vinegars, and international ingredients. Your categories should reflect your family’s eating patterns.
Think about frequency of use when planning shelf placement. Items you reach for daily should be at eye level, while occasional-use items can go higher or lower. This kitchen organization principle makes your pantry more functional for everyday use.
Measure your shelves and larger items to ensure everything will fit in your planned layout. There’s nothing more frustrating than having a perfect organization plan that doesn’t account for the actual space you’re working with.
Step 5: Implement Storage Solutions (1-2 Hours)

Invest in proper storage containers for items that come in boxes or bags. Clear, airtight containers keep food fresh longer and make it easy to see what you have. This step transforms your pantry from functional to truly organized.
Label everything, even if you think you’ll remember what’s in each container. Labels help family members maintain the organization system and make restocking groceries much easier. Use a label maker for a polished look, or simple masking tape works too.
Consider vertical storage solutions for maximizing space. Storage ideas for small homes often focus on using every inch efficiently, including the backs of doors and narrow spaces between shelves.
Step 6: Strategic Restocking and Final Organization (1 Hour)

Place items back in your pantry according to your planned layout. Keep frequently used items at eye level and within easy reach. Less commonly used items can go on higher shelves or toward the back.
Create designated spots for specific items and stick to them. When everything has a home, maintaining organization becomes much easier. This approach is especially important for families where multiple people access the pantry regularly.
Step back and assess your work. Can you easily see and reach everything you use regularly? Is there room for new groceries? A well-organized pantry should feel spacious even when fully stocked, thanks to efficient storage hacks for home organization.
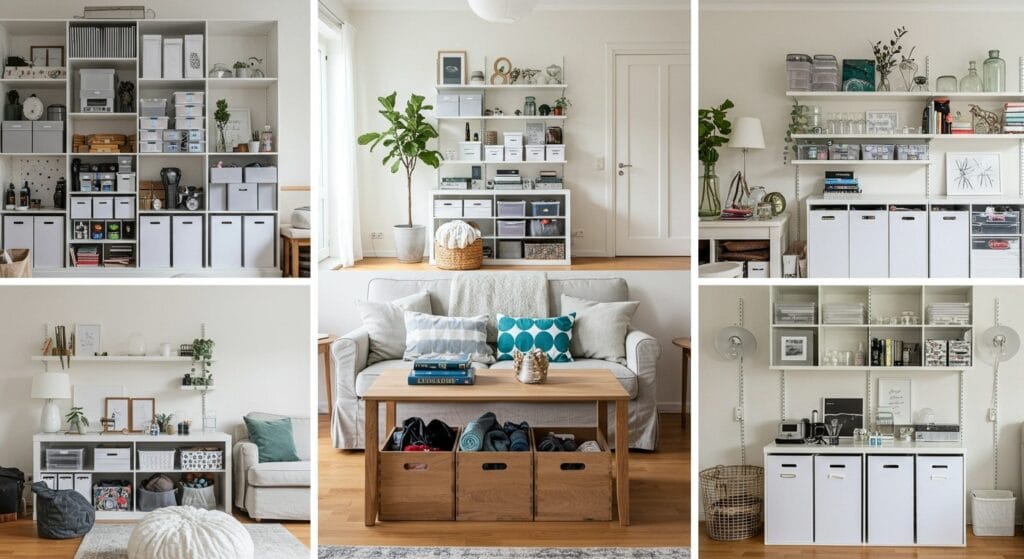
Essential Pantry Organization Tools and Supplies

The right tools make pantry organization sustainable long-term. Clear storage containers are non-negotiable for bulk items like rice, pasta, and cereal. They keep food fresh, prevent pest issues, and make it easy to see when you’re running low on staples.
Shelf risers double your storage capacity by creating two levels on deep shelves. They’re perfect for canned goods and allow you to see items in the back row. Lazy susans work wonderfully for oils, vinegars, and condiments in corner spaces.
Don’t overlook simple solutions like baskets or bins for grouping small items. A basket designated for snack bars keeps them contained and makes grabbing lunch items quick and easy. These kitchen pantry storage hacks often provide the biggest impact for the smallest investment.
Maintaining Your Newly Organized Pantry

The key to long-term success is making maintenance part of your routine. Spend five minutes each week checking for expired items and returning things to their designated spots. This weekly check prevents the slow slide back into chaos.
Involve your family in maintaining the system. Show them where everything goes and explain why the organization matters. When everyone understands and follows the system, it stays organized with minimal effort from you.
Plan your grocery shopping around your organized pantry. Keep a running list of items you’re low on, and resist the urge to overbuy just because something’s on sale. The Container Store’s research shows that people who maintain organized pantries spend 15% less on groceries because they buy only what they need.
Common Pantry Decluttering Mistakes to Avoid

One of the biggest mistakes is trying to organize without decluttering first. You can’t organize clutter – you’ll just have neat piles of things you don’t need. Always purge before you organize, no matter how tempting it is to skip straight to the pretty containers.
Another common error is creating a system that’s too complicated to maintain. If your organization system requires 15 minutes to put away groceries, it won’t last. Simple systems that make sense for your lifestyle are the most successful long-term.
Don’t forget about the vertical space in your pantry. Many people focus only on shelf space and miss opportunities to use door backs, walls, and the space above eye level for less frequently used items.
Budget-Friendly Pantry Organization Solutions

You don’t need to spend hundreds on fancy organizing systems. Repurposed glass jars work beautifully for storing smaller quantities of bulk items. Clean peanut butter jars are perfect for storing nuts, seeds, or homemade spice blends.
Shoeboxes covered with contact paper or wrapping paper make excellent drawer dividers for small items. They’re sturdy enough for pantry use and cost nothing if you’re recycling boxes you already have.
Consider shopping your own home for storage solutions before buying new items. That unused serving tray might be perfect for corralling oils and vinegars. Sometimes the best storage and organization ideas come from looking at everyday items with fresh eyes.
Creating Zones for Different Food Categories

Think of your organized pantry as having different neighborhoods for different types of food. Create a baking zone with all your flour, sugar, baking powder, and special ingredients grouped together. This makes baking projects much more efficient.
Establish a breakfast zone at eye level with cereal, oats, coffee, and other morning essentials. When you’re rushing to get ready for work, you don’t want to hunt through multiple shelves for your breakfast items.
Set up a snack zone that’s easily accessible to family members. Use a basket or designated shelf area for grab-and-go items. This prevents snack items from migrating throughout the pantry and makes packing lunches simpler.
Digital Tools to Support Your Organization
While physical organization is crucial, technology can help maintain your system. Use your smartphone to take a photo of your organized pantry sections. These photos serve as a reference when putting groceries away and help family members maintain the system.
Consider using a simple inventory app to track bulk items. When you use the last of something, add it to your shopping list immediately. Some families find success with shared grocery list apps that everyone can update in real time.
The USDA FoodKeeper app helps you understand how long different foods last in pantry storage. This knowledge helps you make better decisions about what to keep and what to toss during future decluttering sessions.
Your newly organized pantry will transform your daily cooking routine and bring a sense of calm to your kitchen. The investment of one day creates benefits that last for months with minimal maintenance.
Remember, the goal isn’t perfection – it’s creating a system that works for your family and makes meal preparation easier. Your organized pantry should feel like a helpful tool, not another thing to maintain perfectly.
Now that you know exactly how to declutter kitchen pantry in one day, what are you waiting for? Pick your day, gather your supplies, and prepare to fall in love with your pantry all over again. Your future self will thank you every time you open those pantry doors.
Sanjai creates easy, affordable home decor ideas that anyone can try. Through simple tips and curated finds, he helps you style rooms you’ll love coming home to.