Halloween decorating doesn’t have to drain your wallet to create that spine-tingling atmosphere everyone loves. With a little creativity and some clever upcycling, you can craft show-stopping decorations that’ll have your neighbors wondering where you shopped – when really, you just raided your recycling bin and craft drawer.
The best part about homemade spooky decor? It’s completely customizable to your style, whether you prefer elegantly eerie or downright terrifying. These Halloween upcycling projects prove that the most memorable decorations often come from the most unexpected materials.
Ready to turn your home into the talk of the neighborhood without spending a fortune? Let’s explore these viral DIY Halloween decorations that deliver maximum impact for minimal investment.
1. Mason Jar Witch Lanterns
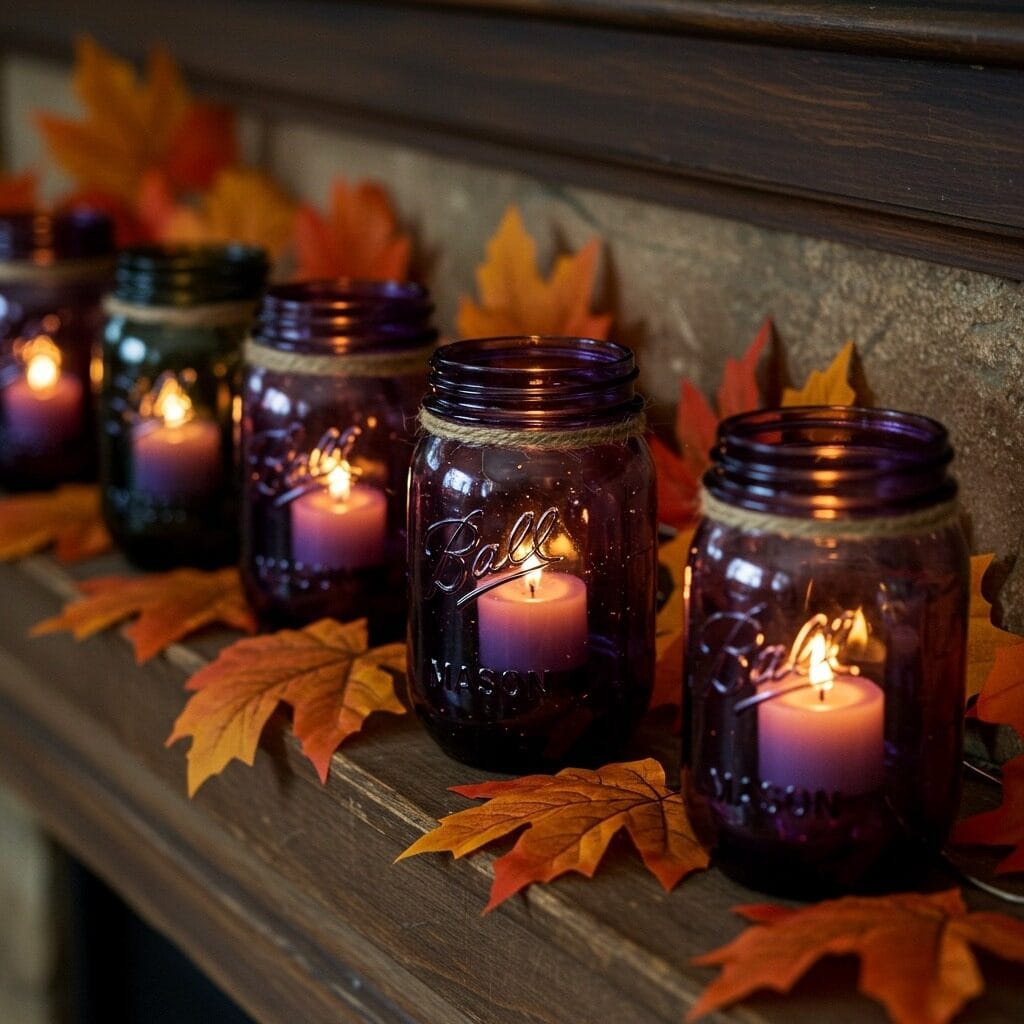
Transform ordinary mason jars into mystical witch lanterns using just paint and battery-operated tea lights. Start with any size mason jar – even old pickle or jam jars work perfectly for this project. Paint them in deep purples, midnight blacks, or forest greens for that authentic witchy vibe.
Once dry, add battery-operated tea lights or string lights inside for a safe, flickering glow. The translucent paint creates the most beautiful ambient lighting that rivals expensive store-bought luminaries. You can even add dried herbs like rosemary or sage around the rim for an extra magical touch.
These lanterns look incredible clustered together on mantels, scattered across your living room coffee table, or lining your front walkway. At under $3 per lantern, you can afford to make dozens without breaking your budget.
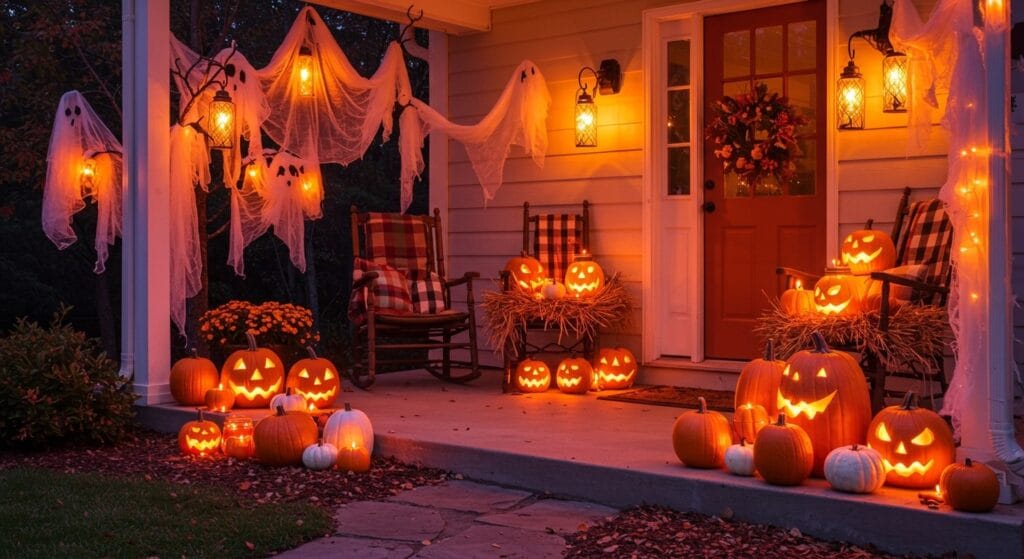
2. Ghostly Cheesecloth Spirits
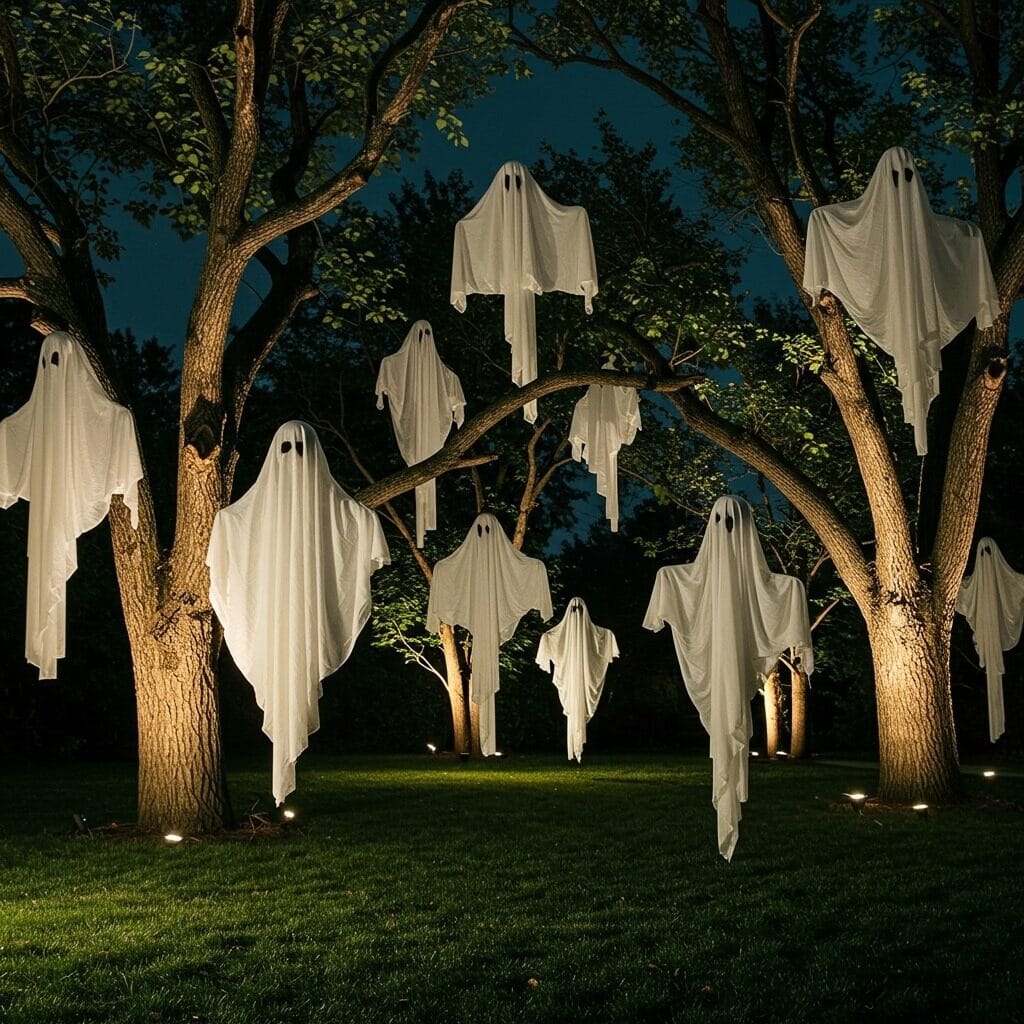
Cheesecloth creates the most hauntingly beautiful ghost decorations you’ve ever seen. Unlike traditional sheet ghosts, cheesecloth has a naturally tattered, aged appearance that moves beautifully in the breeze. All you need is a few yards of cheesecloth, some chicken wire or a foam ball for the head structure, and fishing line for hanging.
Shape the chicken wire into a basic head form, then drape layers of cheesecloth over it, allowing the fabric to cascade naturally. The key is using multiple layers – this creates depth and that authentic ghostly transparency. Secure with a few strategic stitches or safety pins where needed.
Hang these spirits from tree branches, porch overhangs, or even indoors from ceiling hooks. When backlit with outdoor lighting, they create the most spectacular floating effect that looks like something from a high-end haunted attraction.
3. Newspaper Tombstone Garden
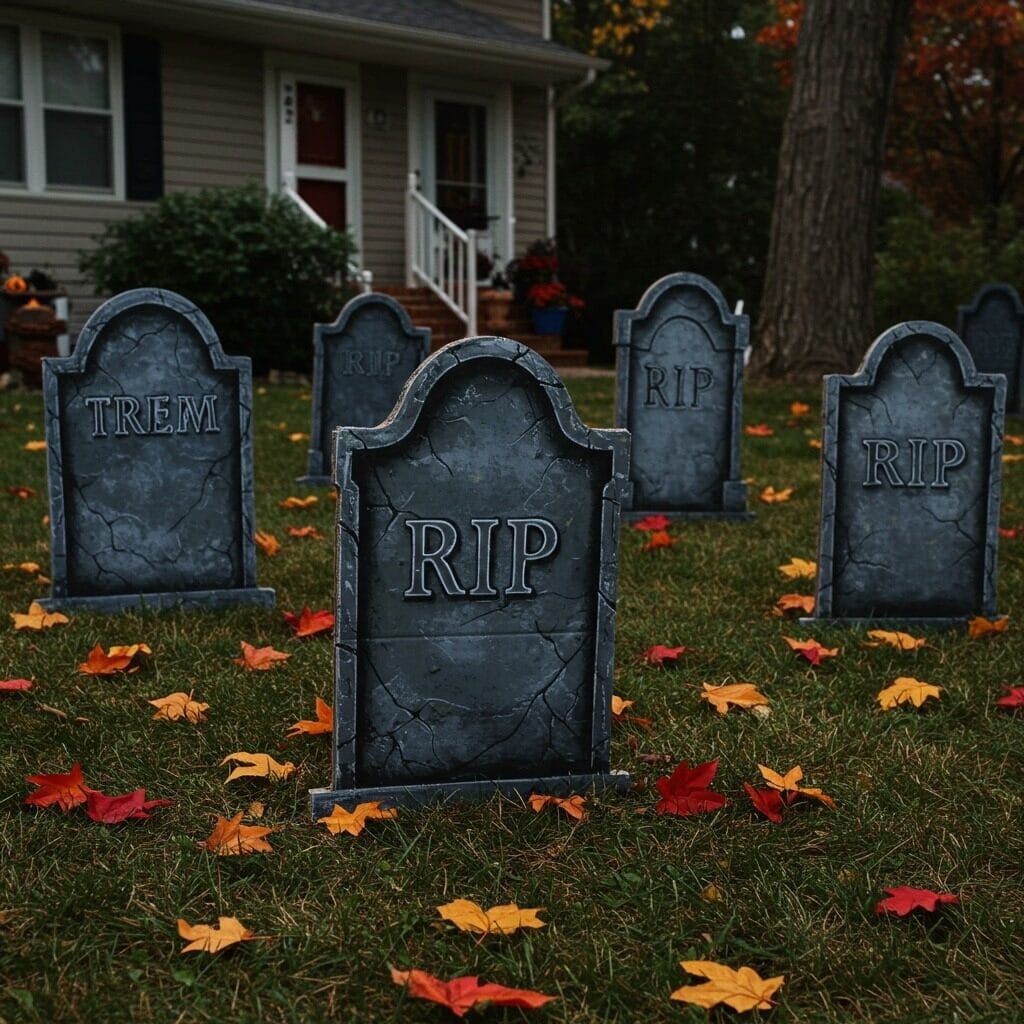
Old cardboard boxes become convincing cemetery markers with just gray paint and a little creativity. Cut tombstone shapes from large cardboard pieces – Amazon delivery boxes are perfect for this. Paint them with gray primer first, then add darker grays and blacks for that weathered stone appearance.
Use a sea sponge or crumpled newspaper to dab on different shades, creating natural stone texture. Add funny epitaphs or spooky sayings using stencils or freehand lettering. “RIP WiFi Connection” or “Here Lies My Diet” add humor to your graveyard scene.
Stake them into your yard using wooden paint stirrers or garden stakes attached to the back. These look incredibly realistic from just a few feet away, and your neighbors will be amazed when you tell them they’re made from recycling materials.
4. Wine Bottle Apothecary Jars
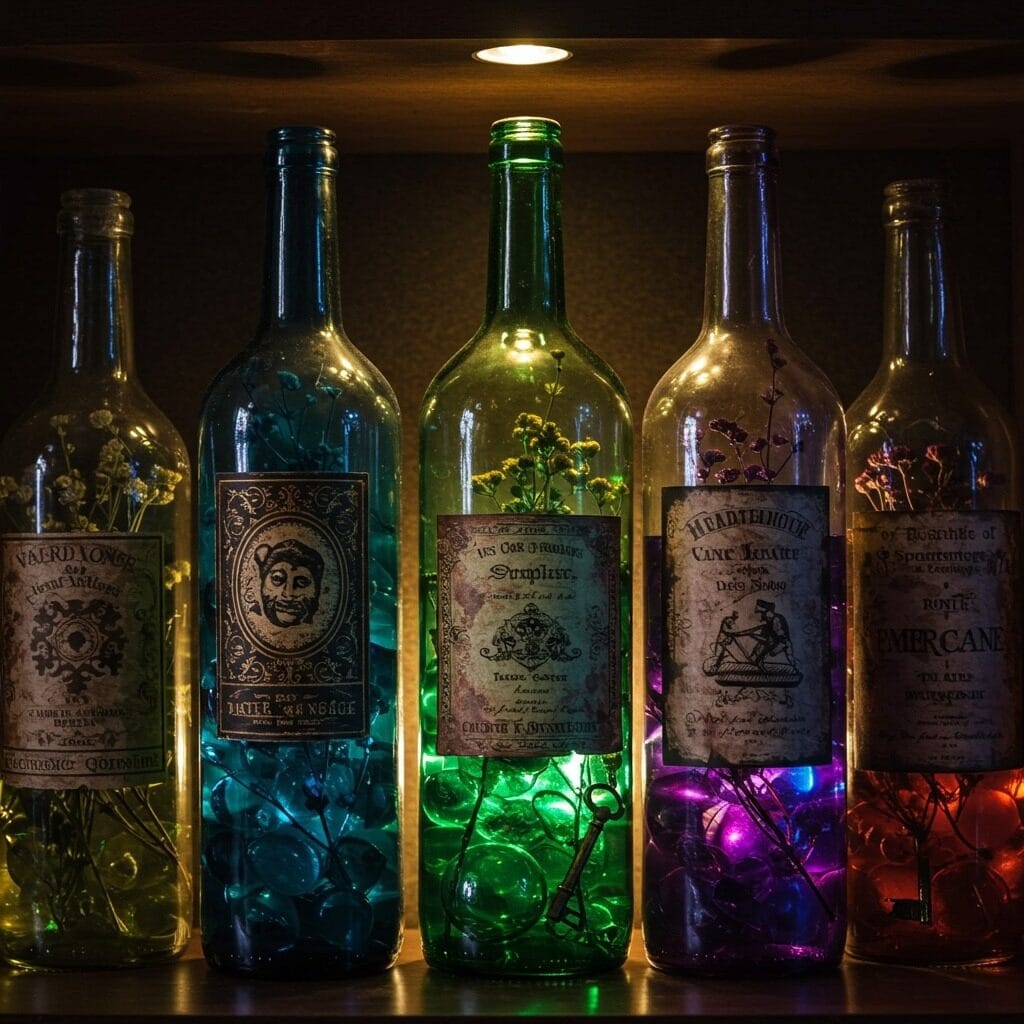
Empty wine bottles become sophisticated apothecary jars perfect for any witch’s collection. Remove labels by soaking in warm, soapy water, then create new vintage-style labels using tea-stained paper and calligraphy. Think “Bat Wings,” “Toad Essence,” or “Midnight Potion.”
Fill with colored water using food coloring – deep purples, forest greens, and blood reds work beautifully. Add floating elements like plastic insects, herbs, or even gummy worms for a playful touch. Cork with wine corks or create custom stoppers using clay and paint.
Display these on floating shelves in your living room, kitchen, or bathroom for an instant witchy apothecary vibe. The amber and green glass of wine bottles naturally creates that vintage laboratory aesthetic that costs hundreds in stores.
5. Upcycled Pumpkin Planters
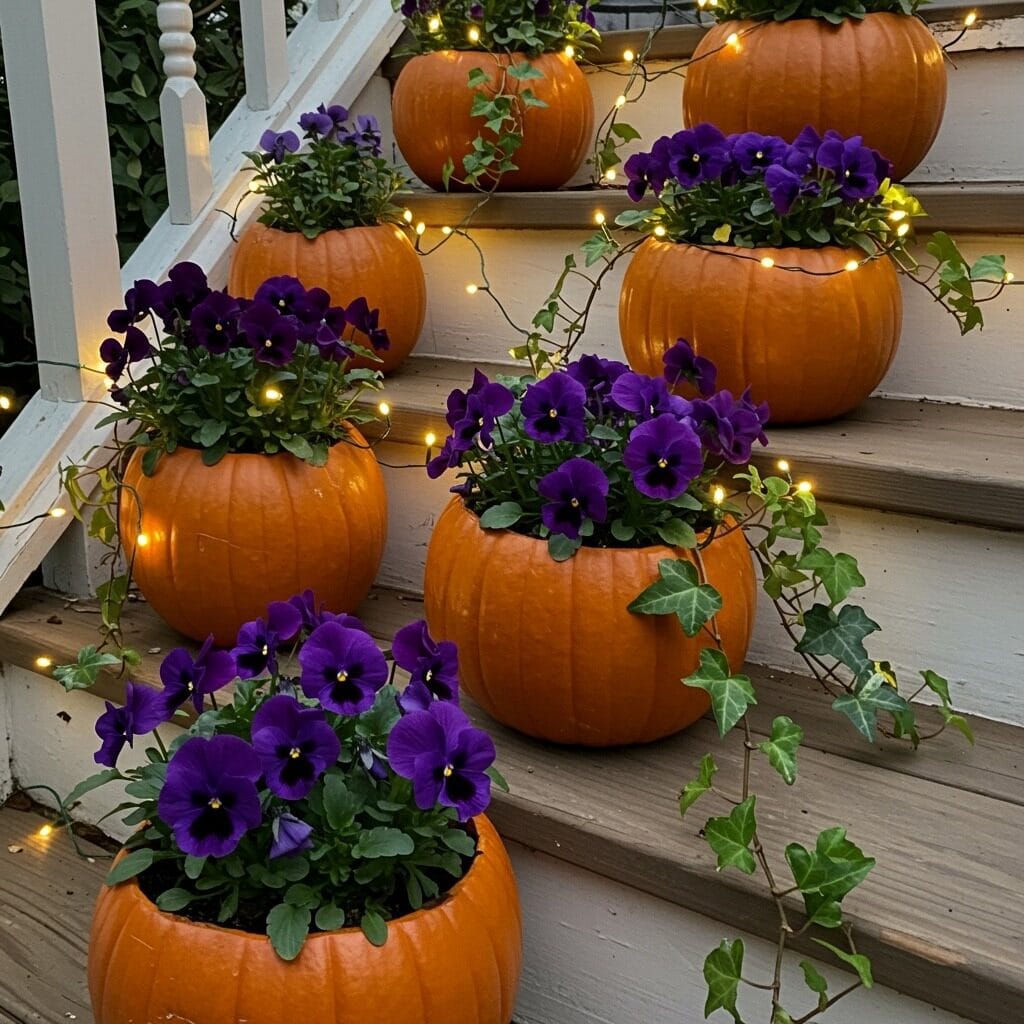
Those plastic pumpkins from years past get a sophisticated makeover as seasonal planters. Drill drainage holes in the bottom, then fill with potting soil and fall flowers like mums, pansies, or ornamental kale. The contrast between the traditional pumpkin shape and elegant plantings creates visual interest.
Choose flowers in deep purples, burgundies, or classic oranges to complement your Halloween color scheme. Adding trailing plants like ivy or sweet potato vine creates movement and softness that elevates the entire display. These work beautifully for both Halloween and Thanksgiving decor.
Position these planters on your porch steps, around your outdoor seating areas, or even indoors as centerpieces. They’re weather-resistant and can transition seamlessly into your fall decorating scheme long after Halloween ends.
6. Creepy Cloth Candle Covers
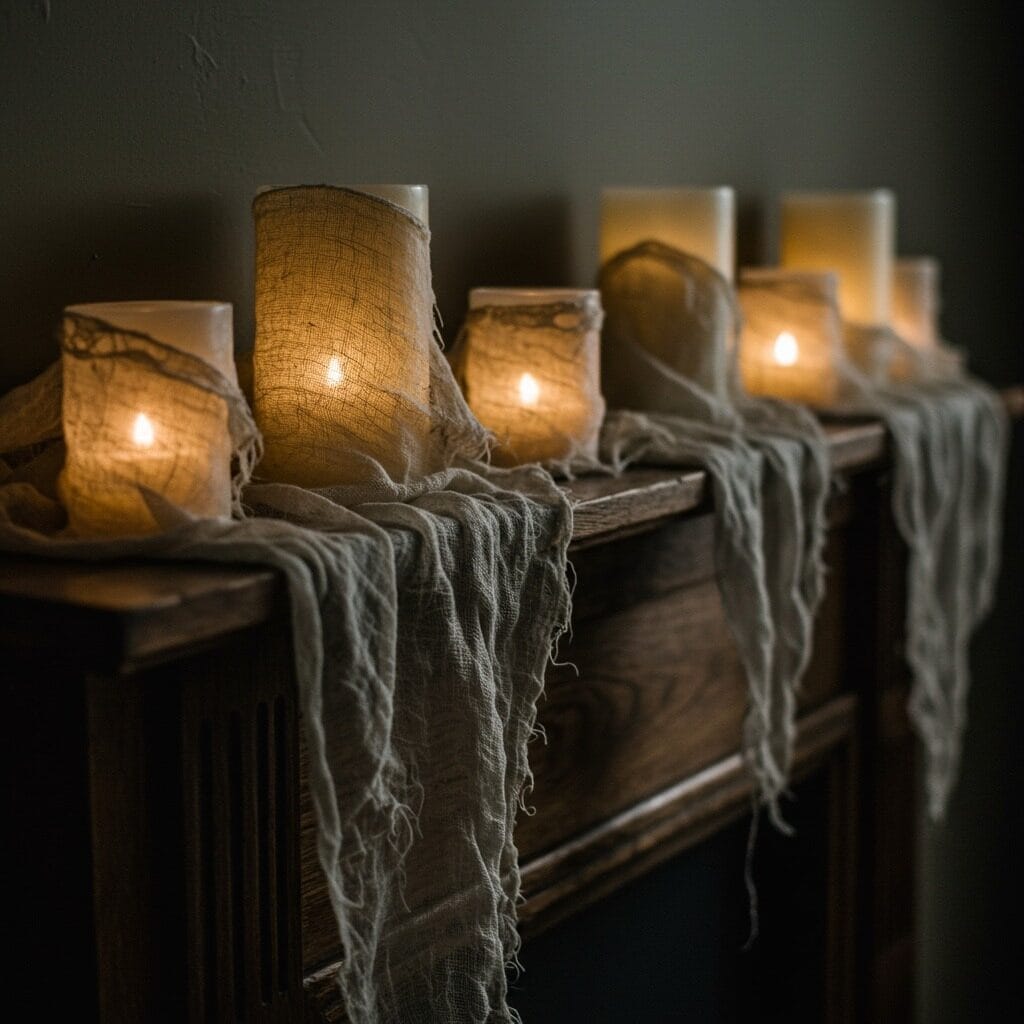
Transform plain pillar candles into spooky focal points using cheesecloth and tea staining techniques. Start with battery-operated candles for safety, then wrap them in layers of cheesecloth that’s been aged with tea or coffee. The staining process gives the fabric that perfect aged, haunted look.
Wrap loosely, allowing some areas to bunch while others stretch thin – this creates interesting light patterns when illuminated. Secure with clear thread or tiny safety pins placed strategically. The varying opacity creates mysterious shadows and glowing spots that dance across your walls.
Group these on mantels, dining table centerpieces, or scattered throughout rooms for ambient lighting. The soft, filtered light they provide is both spooky and surprisingly romantic – perfect for adult Halloween parties.
7. Twig and Yarn Spider Webs
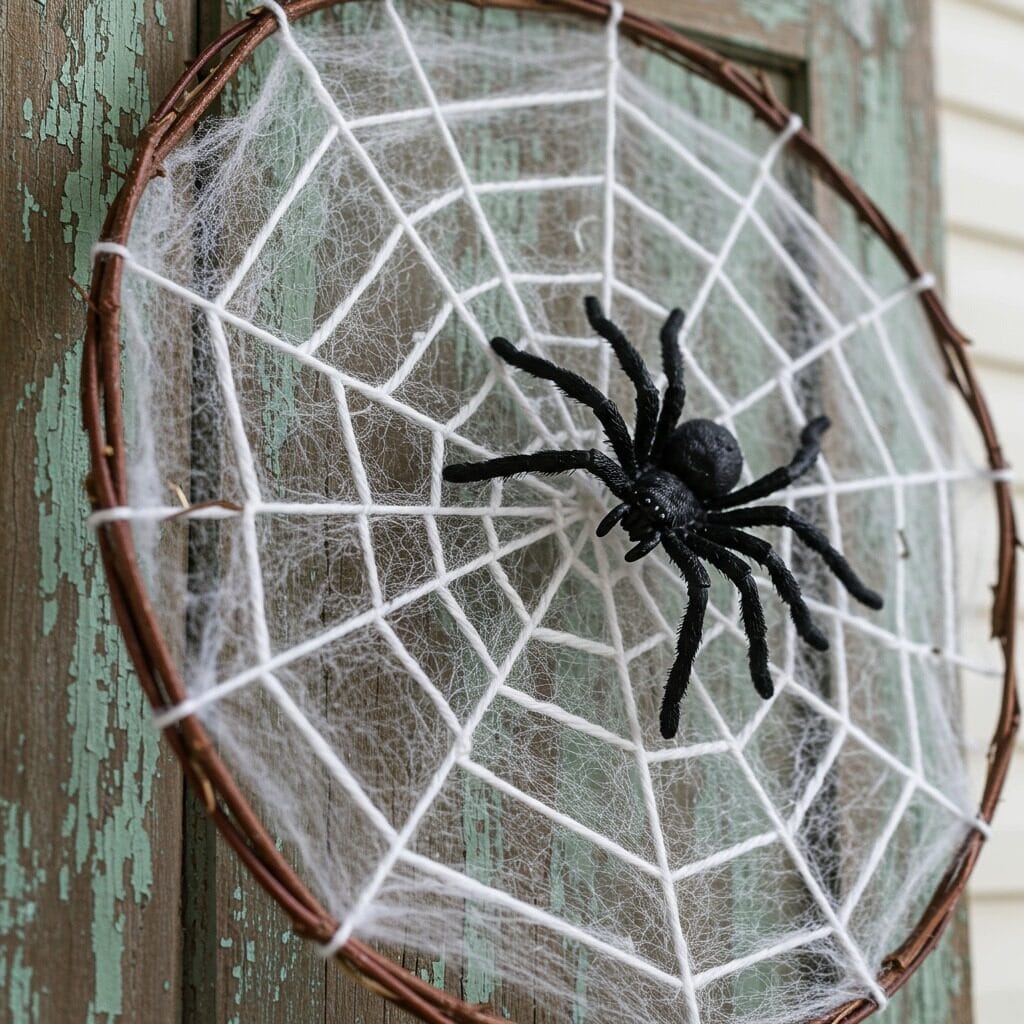
Gather fallen branches and twigs to create spectacular oversized spider webs that cost nothing but look incredibly realistic. Start with longer branches as your main framework – usually 6-8 pieces work well for a door-sized web. Secure intersections with hot glue or wire.
Use white or gray yarn to weave the web pattern, starting from the center and working outward in concentric shapes. Don’t make it too perfect – real spider webs have irregularities that make them more authentic. Leave some sections looser than others for that natural, organic appearance.
Position these in doorways, large windows, or even spanning between porch columns. Add a large plastic spider for the finishing touch, and consider using glow-in-the-dark yarn for sections that will catch outdoor lighting at night.
8. Painted Rock Pumpkin Patch
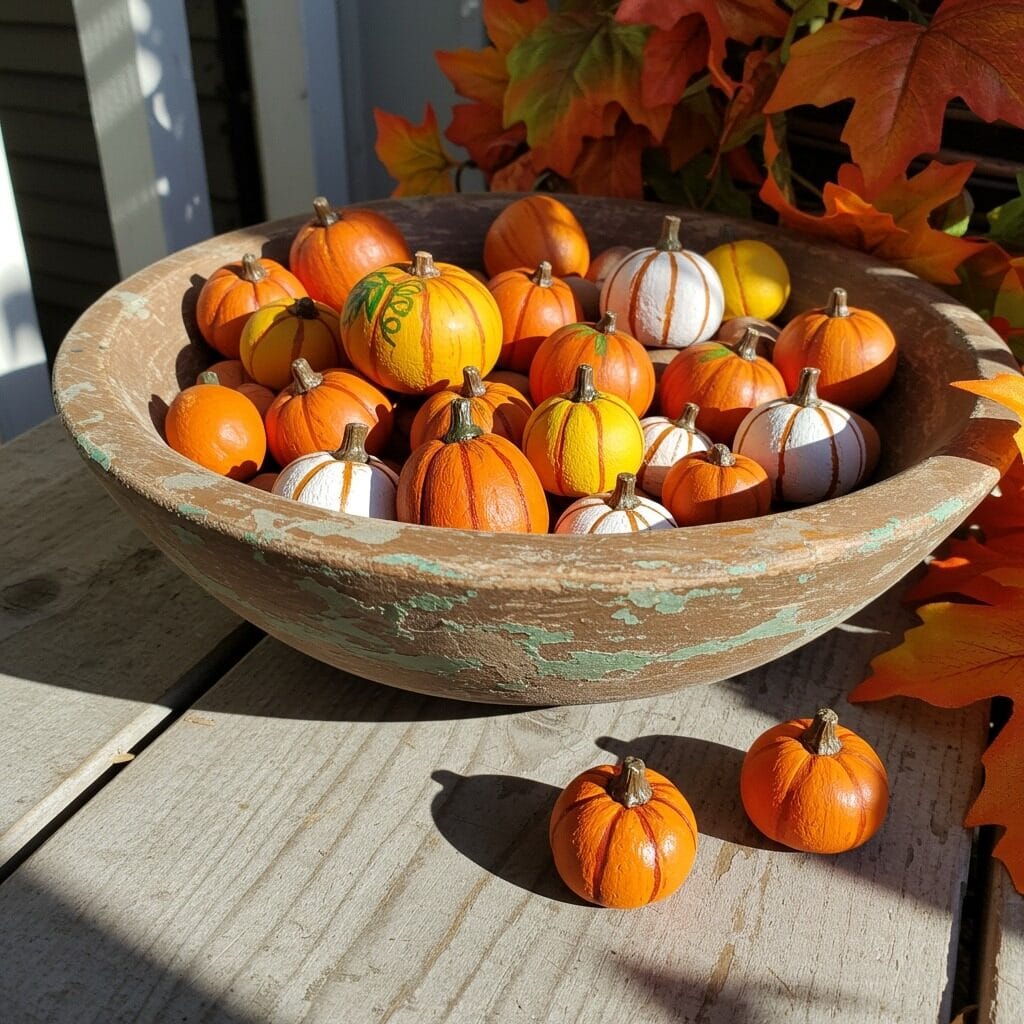
Smooth river rocks become the cutest mini pumpkin patch when painted in traditional orange, white, and green Halloween colors. Choose rocks of varying sizes to create visual interest – from grape-sized to apple-sized works well. Clean them thoroughly before painting with acrylic paint.
Paint vertical lines on each rock to mimic pumpkin ridges, then add a small brown or green stem using paint or a real twig glued to the top. Mix colors – not all pumpkins are orange! White, pale green, and even deep burgundy create a more sophisticated palette.
Display these in wooden bowls, scattered across your kitchen counter, or arranged along walkways. They’re weather-resistant, reusable year after year, and kids absolutely love helping with this project. The natural weight and texture of rocks makes them feel surprisingly realistic.
9. Black Branch Halloween Trees
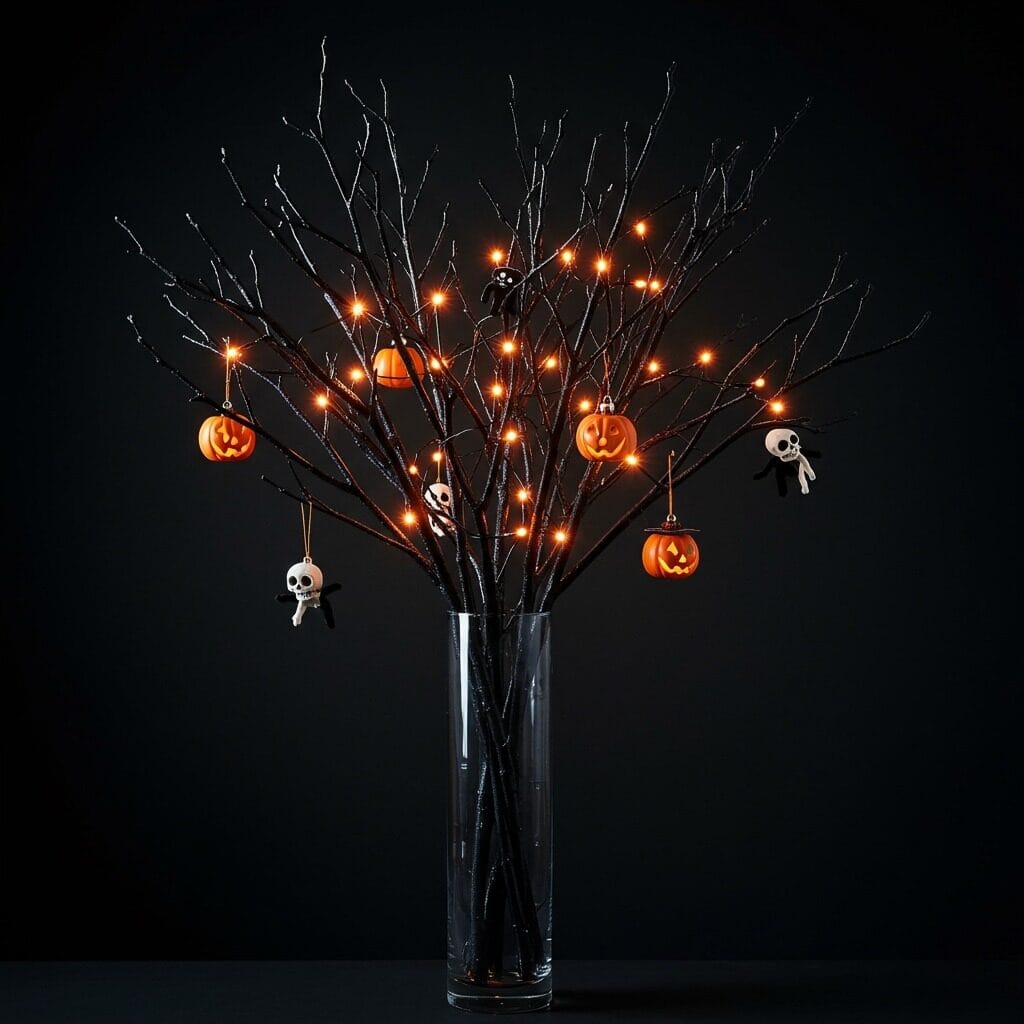
Dead or pruned branches become striking Halloween trees when painted matte black and displayed in tall vases. Look for branches with interesting curves and multiple smaller offshoots – these create the most dramatic silhouettes. Remove any remaining leaves and spray with flat black paint for that stark, winter-tree appearance.
Arrange in tall vases weighted with sand or decorative stones. Add battery-operated string lights in orange or purple for a magical glow, and hang small Halloween ornaments like mini pumpkins, bats, or ghosts from fishing line. The vertical element adds height and drama to your decor.
These work beautifully as dining table centerpieces or positioned in corners of rooms where they won’t obstruct traffic. Change out the ornaments and lights to transition from Halloween through Christmas – the black branches are surprisingly versatile.
10. Coffee Filter Bat Colony
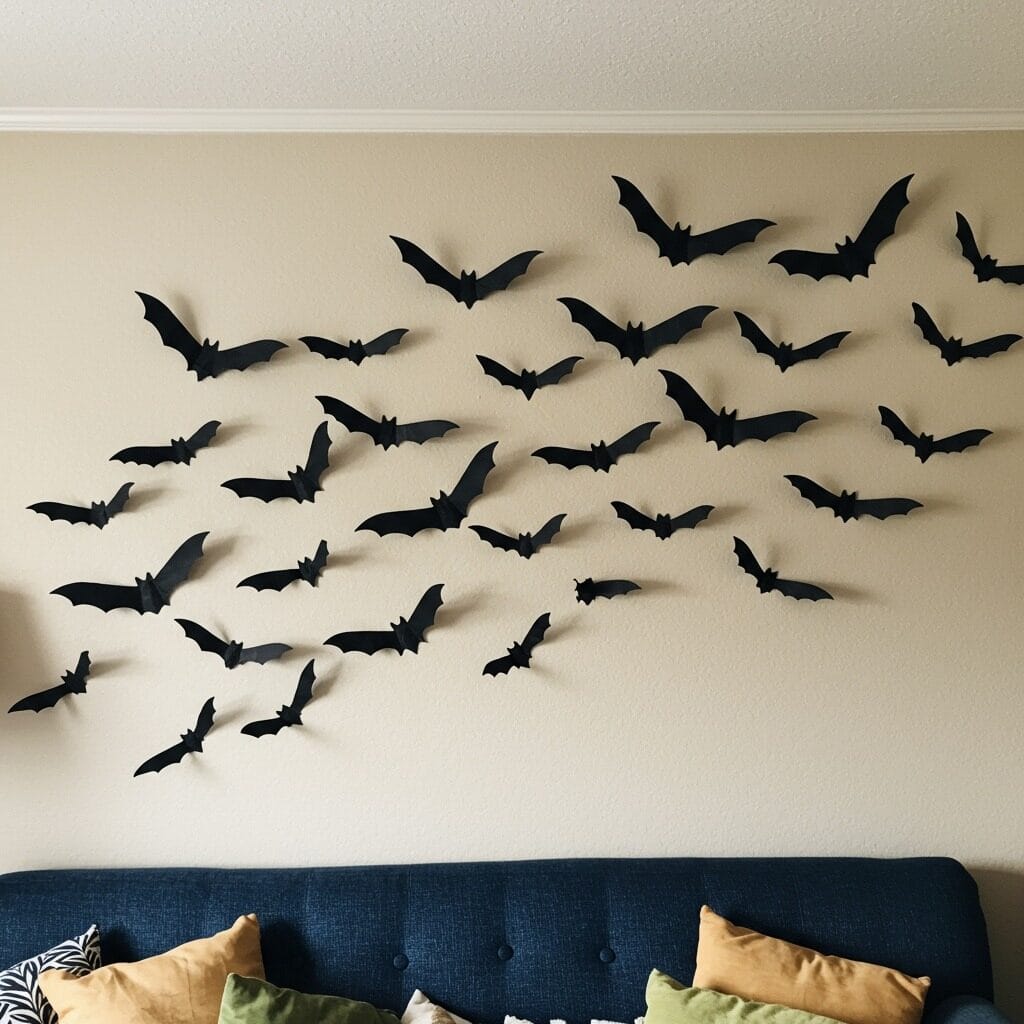
Coffee filters dyed black create the most realistic bat wings you’ve ever seen. The natural texture and semi-transparency of coffee filters perfectly mimics bat wing membrane. Dye white filters in black coffee or food coloring, then cut bat silhouettes once dry.
Create templates in various sizes for visual interest – from tiny bats to large statement pieces. Fold filters in half before cutting to ensure symmetrical wings. Attach to walls using removable adhesive strips, creating flying formations across ceilings or down hallways.
The best part about this home improvement idea is the dramatic impact with minimal investment. Position them where they’ll catch light sources to create interesting shadows on walls. Remove carefully after Halloween and store flat for next year’s display.
11. Milk Jug Ghost Luminaries
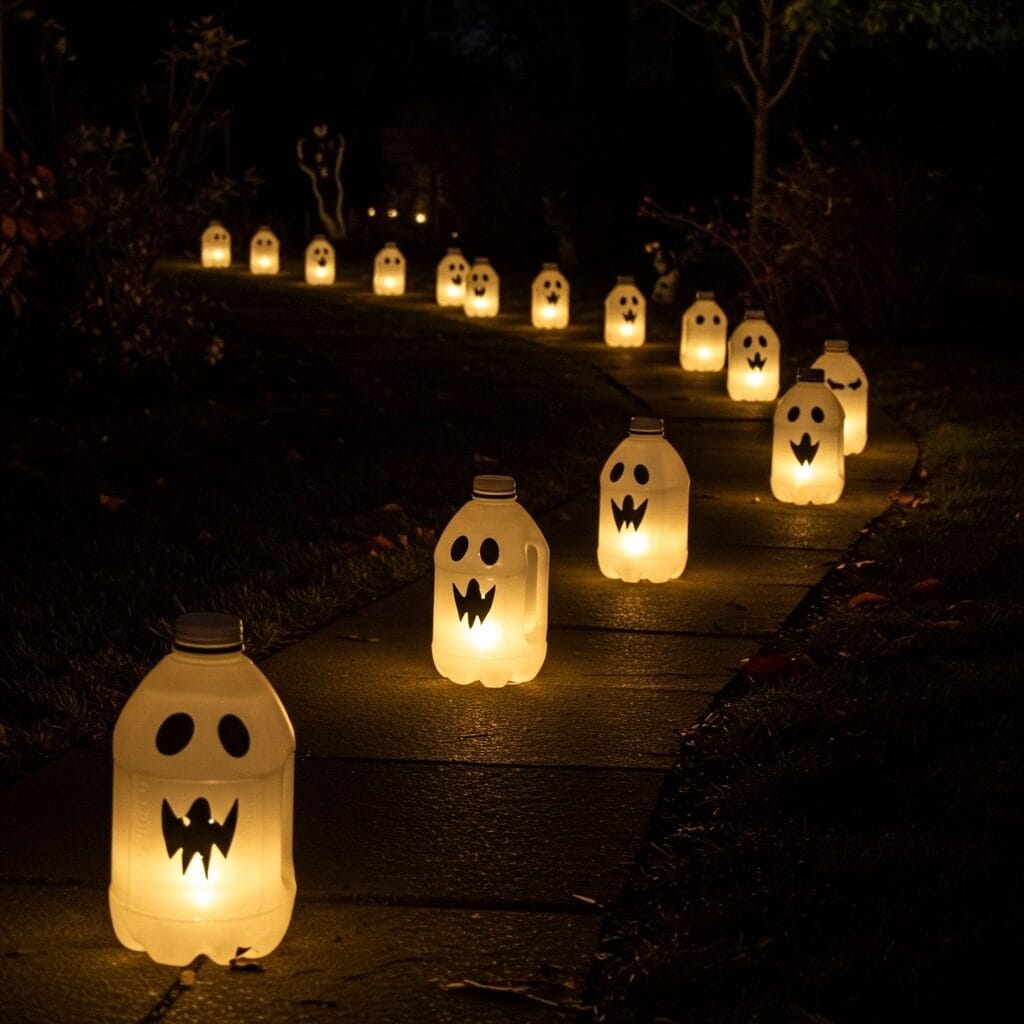
Empty milk jugs transform into adorable ghost luminaries that provide both decoration and pathway lighting. Clean thoroughly and remove labels, then cut ghost faces using a craft knife – two eye holes and a mouth work perfectly. The translucent plastic creates beautiful light diffusion.
Add battery-operated LED lights or string lights inside – avoid real candles for safety. The plastic naturally diffuses light, creating a soft, ethereal glow that’s both spooky and welcoming. Make faces vary from friendly to slightly spooky depending on your audience.
Line these along walkways, group on porch steps, or hang from shepherd’s hooks in your yard. They’re completely weather-resistant and cost almost nothing to make. Fill the bottom with sand or small stones to prevent them from blowing around on windy nights.
12. Newspaper Mache Pumpkins
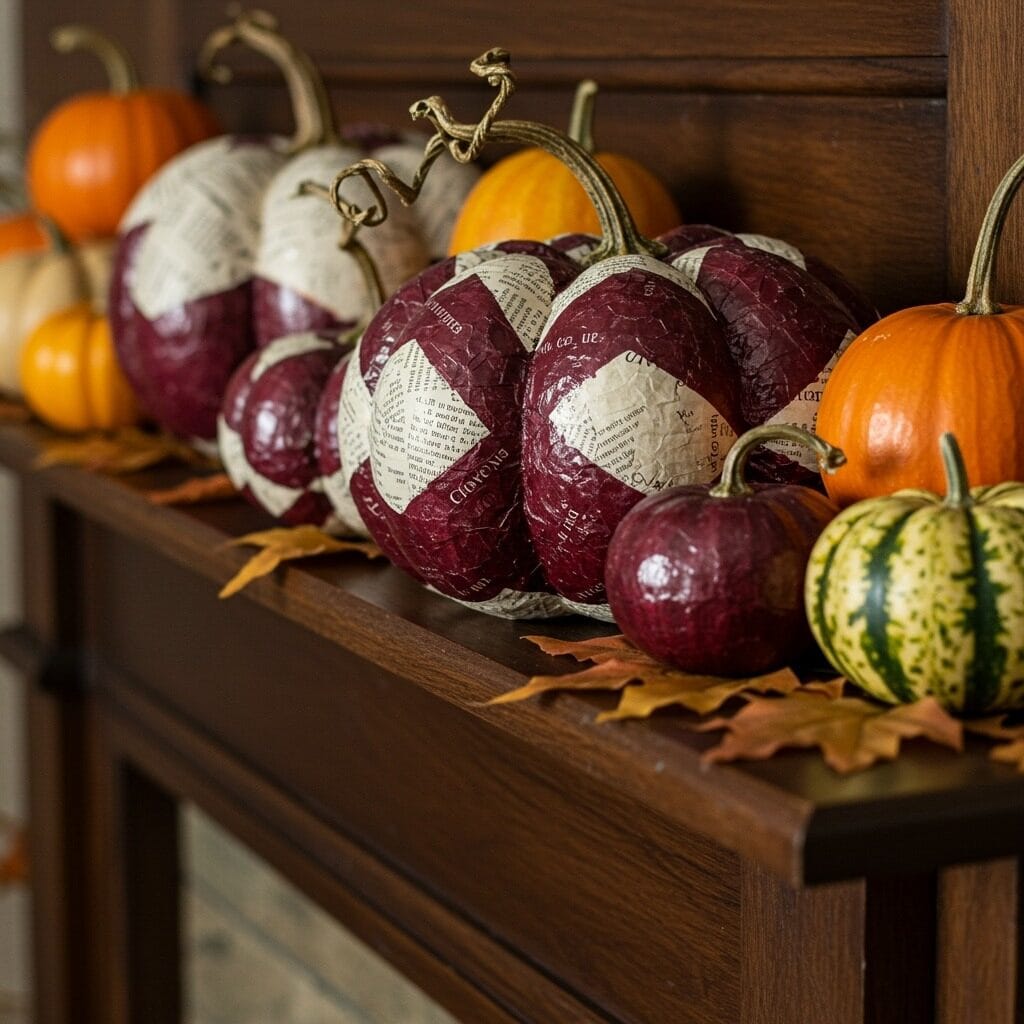
Old newspapers and flour-water paste create surprisingly elegant pumpkins that rival expensive ceramic versions. Use balloons as forms – inflate to desired pumpkin size, then apply newspaper strips dipped in paste (1 part flour to 1 part water works perfectly). Apply 3-4 layers, allowing each to dry completely.
Once fully dry, pop the balloon and remove through a small hole that becomes the stem area. Paint with acrylic paint in sophisticated colors – deep burgundies, sage greens, or classic orange. Add vertical lines with a darker shade to mimic natural pumpkin ridges.
These look incredibly high-end when displayed with real gourds and autumn leaves on mantels or dining table centerpieces. The papier-mache technique according to sustainable decorating experts at Better Homes & Gardens creates durable decorations that last for years with proper storage.
13. Trash Bag Spider Decorations
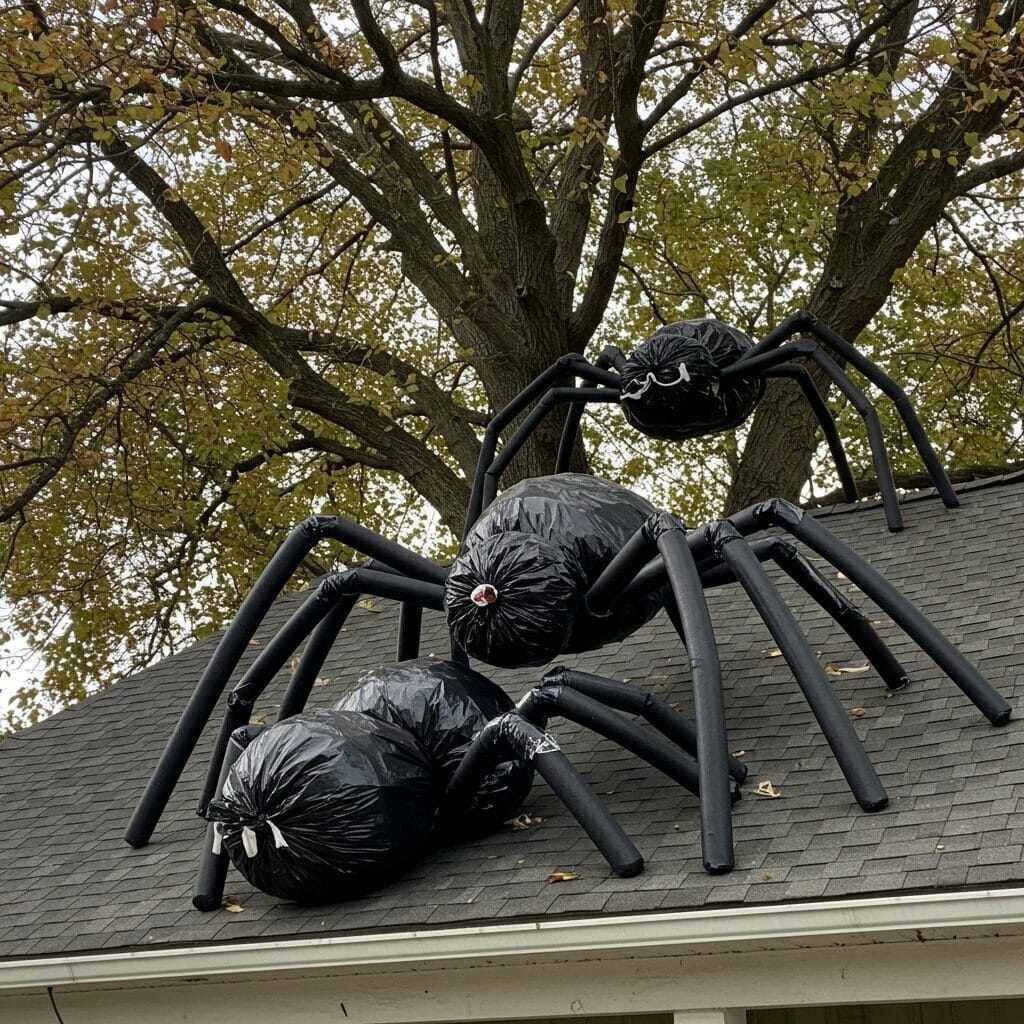
Black trash bags stuffed with newspaper or old clothes become impressive giant spiders that look like expensive Halloween props. Use two bags – one for the abdomen and a smaller one for the head/thorax section. Tie securely and attach together with duct tape or rope.
Pool noodles cut in half create perfect spider legs – four sections total, giving you eight legs when split lengthwise. Insert into the body using long screws or push through and secure with duct tape. Bend and position legs for realistic spider poses.
Position these on porch roofs, large tree branches, or even emerging from outdoor spaces like they’re crawling out of hiding spots. Add reflective tape spots for eyes that catch light at night. These look absolutely terrifying from a distance and cost under $10 to create.
14. Wine Cork Pumpkin Mosaics
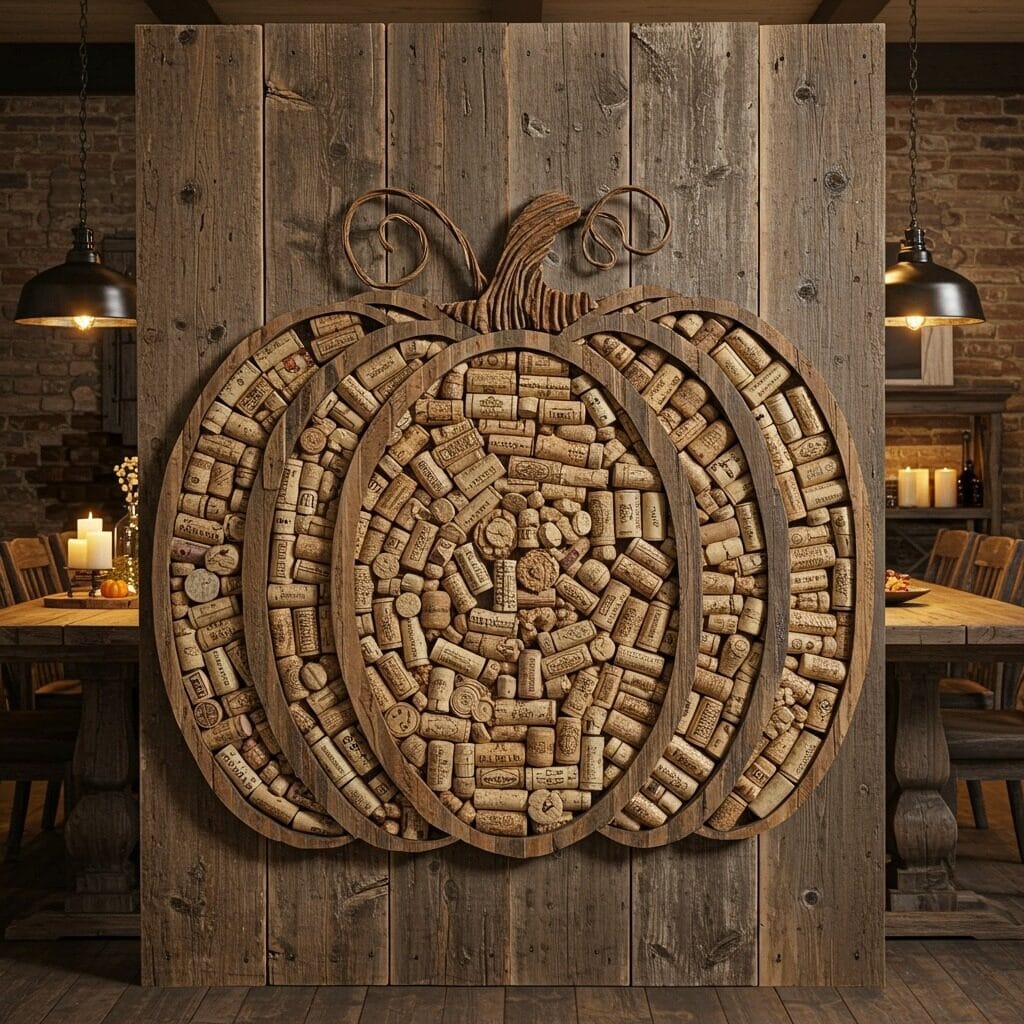
Save those wine corks all year for this sophisticated Halloween project. Draw or stencil a pumpkin shape onto reclaimed wood or canvas, then fill with corks arranged in mosaic patterns. Use natural cork colors or paint some in orange and brown for more traditional pumpkin hues.
Hot glue corks in place, varying their orientation for visual texture. Some vertical, some horizontal, some at angles – this creates depth and interest. Fill in gaps with smaller cork pieces or leave some spaces for a more organic feel.
This works beautifully as living room wall art or positioned on an easel in your entryway. The neutral cork tones work with any decorating style, from farmhouse to modern. It’s sophisticated enough to leave up through Thanksgiving and even into winter decor.
15. Tin Can Luminaries with Punched Designs

Empty tin cans become elegant luminaries when you punch Halloween designs through the metal. Remove labels and fill with water, then freeze solid – this prevents denting when punching holes. Use a nail and hammer to create patterns like pumpkins, ghosts, bats, or even just random dot patterns for starry effects.
Once thawed and dried, paint the exterior with spray paint in metallic colors like bronze, copper, or matte black. The punched holes will show the original metal color, creating beautiful contrast. Add battery-operated tea lights for safe illumination.
Group these on patio steps, along walkways, or as dining table centerpieces. The punched metal creates the most beautiful light patterns on surrounding surfaces. They’re completely weatherproof and can be stored easily for next year.
Making Your DIY Halloween Decorations Last
The beauty of these budget Halloween crafts lies not just in their affordability, but in their reusability. Store your creations properly – paper-based decorations in dry containers, painted items wrapped carefully to prevent chipping – and you’ll have custom Halloween decor for years to come.
Consider making these projects family traditions. Kids love helping with painting, stuffing, and arranging, and the memories created often become more valuable than the decorations themselves. Plus, you can modify and improve your designs each year.
These DIY Halloween decorations prove that creativity trumps budget every time. With some ingenuity and basic crafting supplies, you can create a Halloween display that rivals expensive store displays while staying true to your personal style and budget.
Sanjai creates easy, affordable home decor ideas that anyone can try. Through simple tips and curated finds, he helps you style rooms you’ll love coming home to.