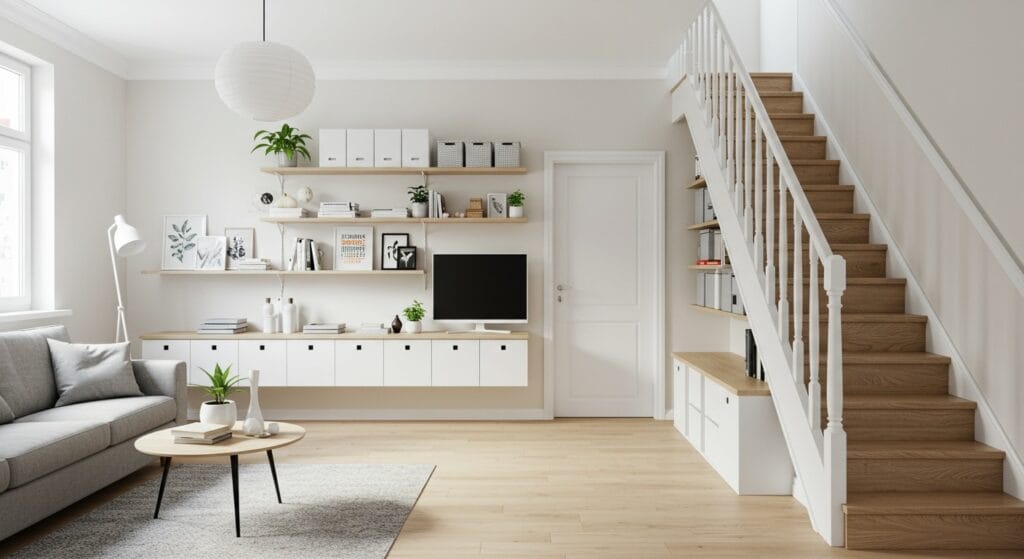
Running out of places to put your stuff? I get it. When floor space is precious and closets are bursting, walls become your best friend. And nothing maximizes vertical real estate quite like floating shelves.
The beauty of wall-mounted shelves goes beyond just storage. They create visual interest, add personality to bland walls, and give you a chance to show off your favorite things. Plus, when you build them yourself, you get exactly what you need at a fraction of store prices.
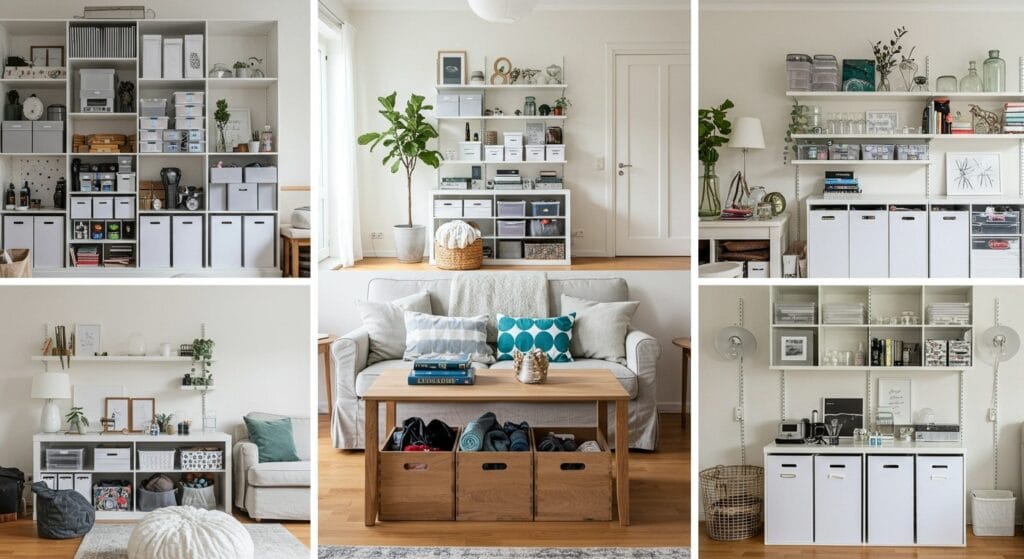
Whether you’re tackling a cramped kitchen, a cluttered bathroom, or a bedroom that refuses to cooperate, these 15 ideas will help you reclaim your space. Some are ridiculously simple, others need a bit more effort. But all of them deliver serious storage without eating up your square footage.
Why Floating Shelves Beat Traditional Shelving
There’s something about floating shelves that feels modern and intentional. Without visible brackets cluttering the look, your walls appear cleaner and less busy. This matters especially in small spaces where every design choice either opens things up or closes them in.
Traditional shelving units take up floor space you probably don’t have. They also create visual weight that makes rooms feel smaller. Floating shelves, on the other hand, keep the floor clear and trick the eye into seeing more space than actually exists.
The DIY aspect gives you control over dimensions, finish, and placement. Store-bought options lock you into standard sizes that might not fit your specific wall or storage needs. When you build your own, that awkward gap between the window and corner becomes perfectly usable.
1. Reclaimed Wood Floating Shelves for Rustic Charm
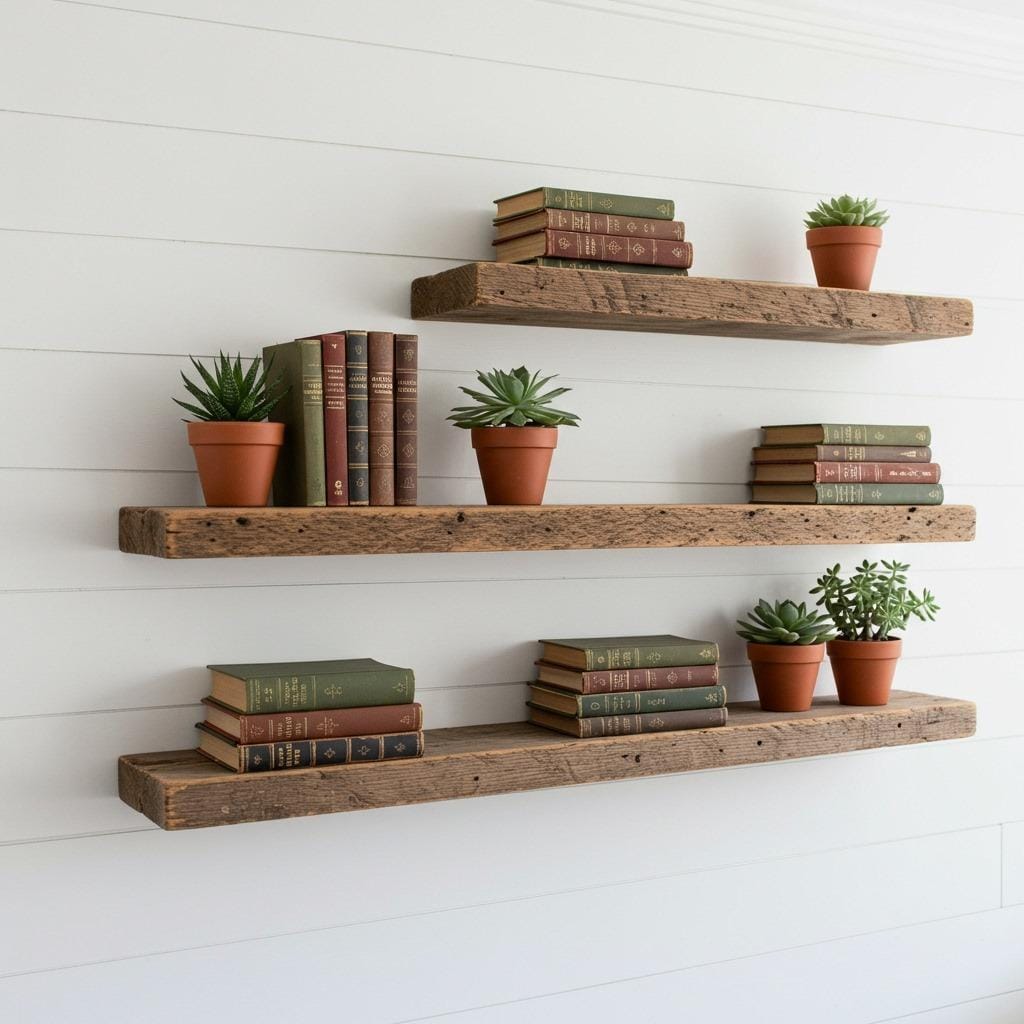
Old barn wood or reclaimed lumber brings instant character to any room. The weathered texture and natural variations in color create visual interest that new wood simply can’t match. You’ll find these boards at salvage yards, demolition sites, or specialty lumber shops.
Sand down rough spots but don’t overthink the finishing. The imperfections are the whole point. A light coat of matte polyurethane protects the wood while maintaining that aged appearance. The mounting hardware stays hidden behind the boards, preserving that floating effect.
These work beautifully in living rooms where you want warmth without going full farmhouse. They also complement modern spaces by adding an organic element that softens all those clean lines. Just make sure your wall anchors can handle the weight since reclaimed wood tends to be denser than pine.
2. Industrial Pipe Shelf Brackets with Wood Planks
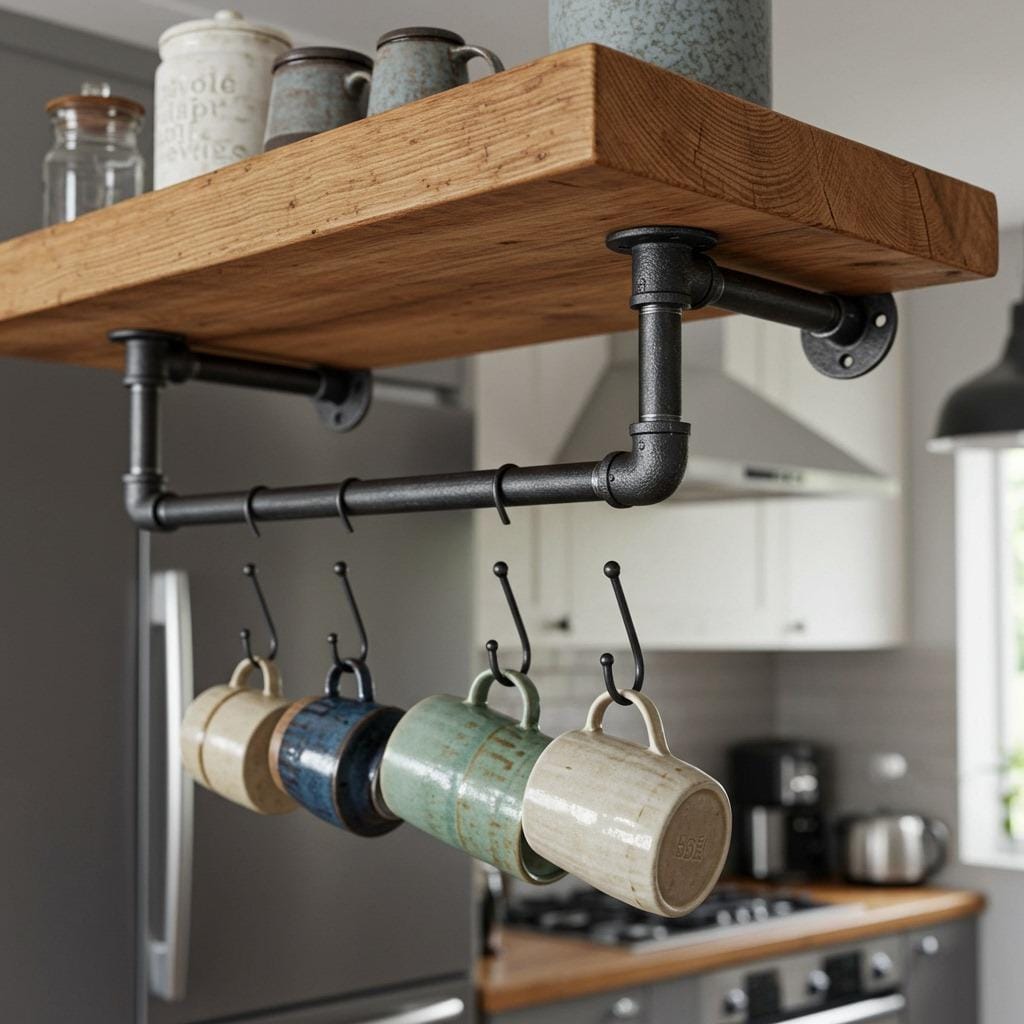
The industrial look continues to hold its own in home design, and pipe brackets deliver that aesthetic perfectly. Black iron pipes combined with substantial wood planks create shelving that feels sturdy and purposeful. This isn’t delicate decor, it’s functional storage that can handle real weight.
You can find pre-threaded pipes and fittings at any hardware store. Assemble the bracket shape you want, spray paint if black iron isn’t available, then mount securely to wall studs. The wood plank sits right on top, no fancy joinery required.
This approach works particularly well in kitchens where you need shelves that can support dishes, appliances, or pantry items. The open design keeps things accessible while the industrial style adds edge to what might otherwise be a bland wall.
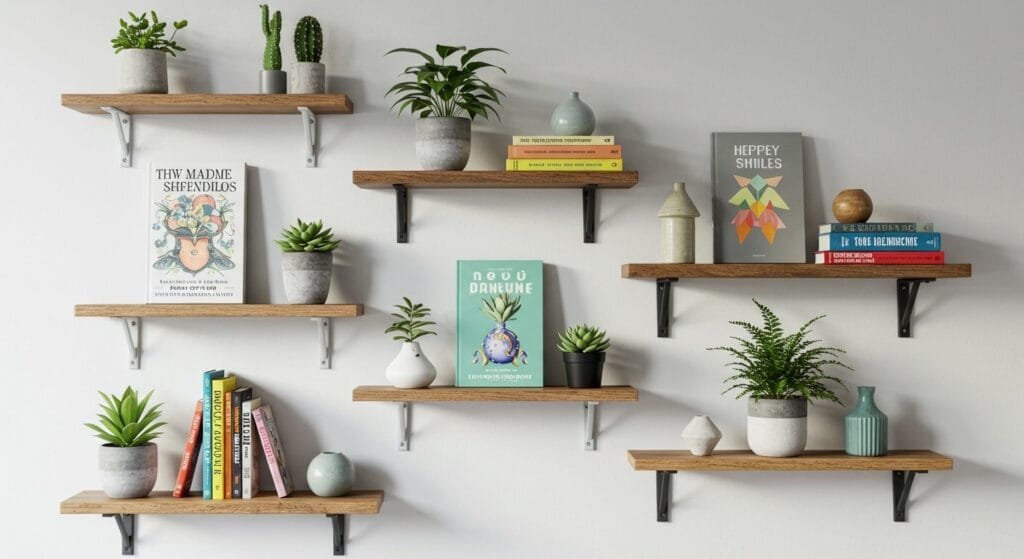
3. Thin Floating Ledges for Rotating Art Displays

Sometimes you don’t need deep shelves, just a place to prop things up. Thin ledges (2-3 inches deep) create perfect perches for framed photos, art prints, or greeting cards you can’t bear to toss. The shallow depth means they don’t protrude far from the wall, keeping walkways clear.
These ledges excel at creating gallery walls without putting holes in every single frame. Swap out art whenever the mood strikes, no tools required. This flexibility matters when you’re still figuring out your style or if you like refreshing your space seasonally.
Build them from 1×2 or 1×3 boards with a small lip at the front to keep items from sliding off. Paint them to match your wall for a seamless look, or choose a contrasting color to define the display area. Either way, they’re among the simpler small space storage hacks you can pull off in an afternoon.
4. Corner Floating Shelves to Use Dead Space
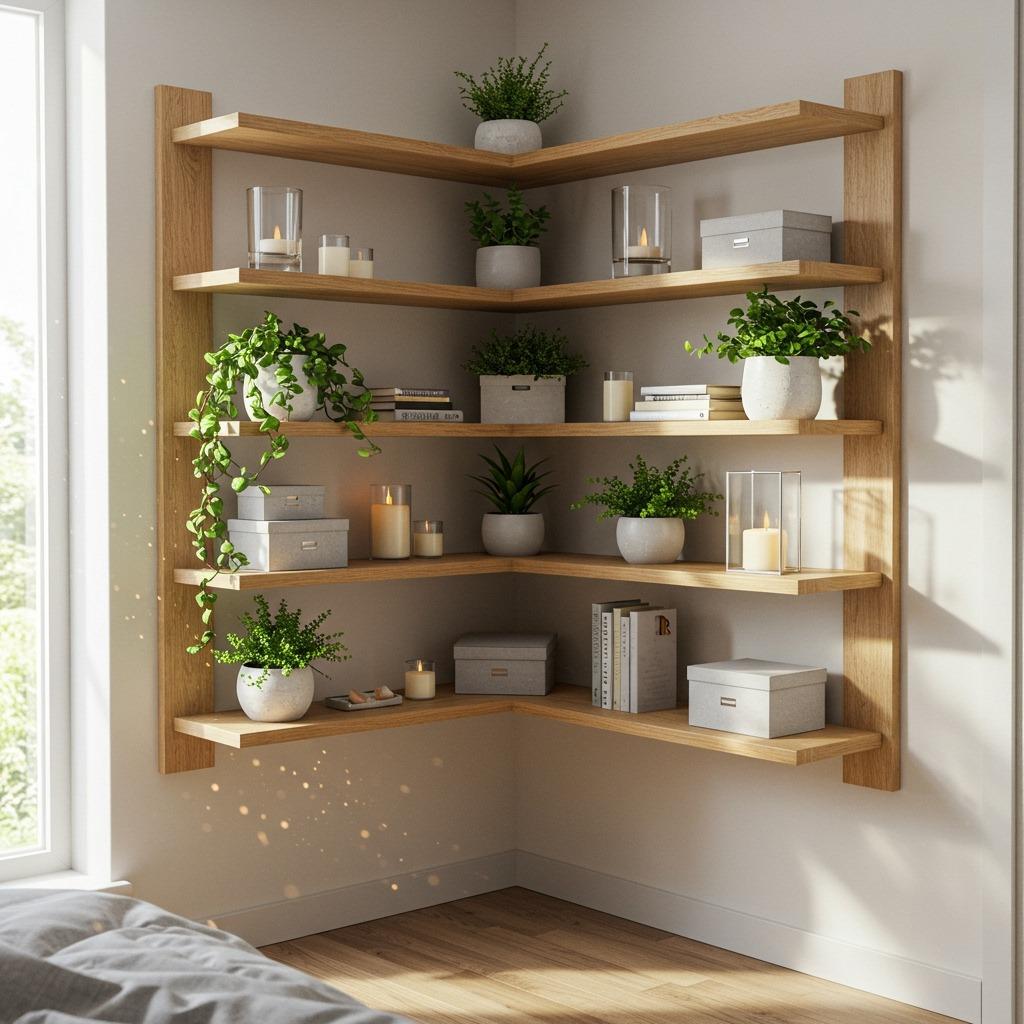
Corners get ignored in most rooms, but they’re actually prime real estate for storage. Custom corner shelves wrap around that 90-degree angle, giving you usable surface area where nothing existed before. They’re particularly useful in bedrooms and bathrooms where wall space runs short.
Cut your boards at 45-degree angles where they meet, creating a seamless L-shape that flows around the corner. You’ll need to mount into studs on both walls for stability. The trick is getting your measurements precise so everything lines up cleanly.
Stack multiple corner shelves at different heights to create a sculptural display. This vertical approach draws the eye upward and makes ceilings feel higher. Plus, you’re using space that would otherwise sit empty, which is basically found storage.
5. Live Edge Floating Shelves for Organic Appeal

Live edge wood preserves the natural contour of the tree, creating shelves with character and movement. That irregular edge softens the geometric precision of most rooms and brings in an organic element that feels both modern and timeless. Each piece is completely unique.
You’ll pay more for live edge slabs than standard lumber, but the visual impact justifies the cost. Look for pieces that are already dried and stabilized to prevent warping. The mounting hardware needs to be extra secure since these slabs are typically heavy and substantial.
These shelves become statement pieces rather than background elements. Use them sparingly, maybe one standout shelf in a room rather than a whole wall of them. They pair beautifully with minimalist decor by adding natural texture without clutter.
6. Invisible Floating Shelf Brackets for Clean Lines

The magic of truly invisible brackets lies in how they disappear completely. Heavy-duty rods mount directly into studs, then the shelf slides over them with drilled holes that align perfectly. From any angle, there’s no visible means of support, just a shelf defying gravity.
This method requires precision drilling and solid wall anchors. The payoff is a floating shelf design that looks impossibly clean and modern. The shelves themselves should be thick enough (at least 1.5 inches) to accommodate the bracket rods without splitting.
These work best with heavier items that won’t shift around. Once installed, the shelves are extremely stable despite having no visible brackets. They’re perfect for contemporary spaces where you want storage to feel integrated rather than added on.
7. Rope-Suspended Floating Shelves for Bohemian Style

Rope-suspended shelves bring movement and softness to what’s usually a rigid element. Thick nautical rope or natural jute cord threads through holes drilled in each shelf corner, creating a system that’s both functional and decorative. The shelves sway slightly, adding life to the space.
Secure the rope to ceiling joists or heavy-duty ceiling anchors rated for the weight you’ll be storing. Knot the rope below each shelf to create set intervals, or use wooden beads as spacers. This system lets you adjust shelf heights easily if you need to reconfigure later.
The bohemian aesthetic fits perfectly in cozy bedrooms or relaxed living spaces. Just remember that anything on these shelves needs to be stable since they’ll move if bumped. Save them for lighter decorative items rather than heavy books or electronics.
8. Chunky Beam Floating Shelves for Maximum Weight Capacity
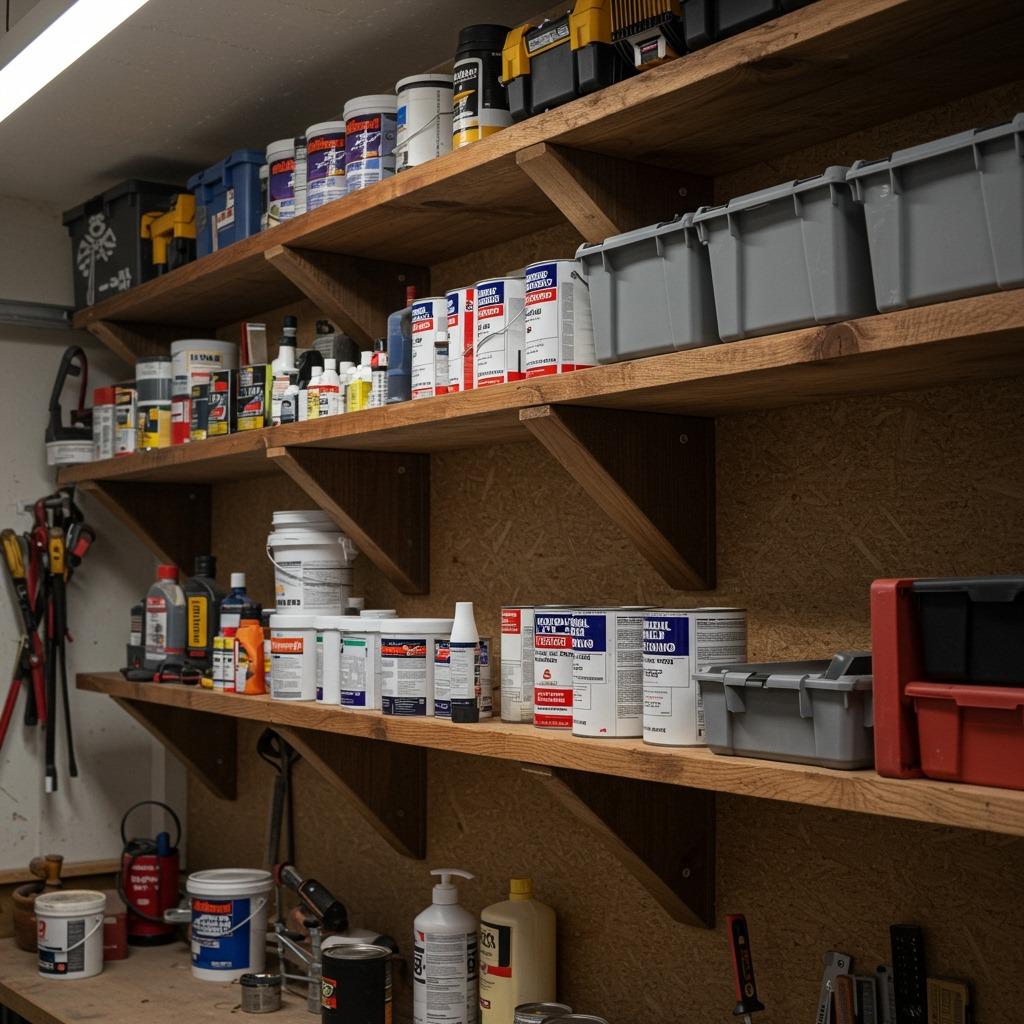
When you need shelves that can handle serious weight, chunky beams deliver. Think 4×4 or 4×6 lumber mounted with heavy-duty brackets hidden inside the beam itself. These shelves won’t bow under the weight of appliances, book collections, or storage bins packed with supplies.
The substantial thickness makes a bold visual statement while serving a practical purpose. In garages and workshops, they provide industrial-strength storage without looking like utilitarian wire shelving. In living spaces, they add architectural heft that grounds a room.
Finish them naturally to show off the wood grain, or paint them a bold color to make them pop. The mounting process requires more effort since you’re working with heavy lumber, but the result is bomb-proof storage that’ll outlast your house. Proper wall anchoring is crucial for heavy-duty floating shelves to prevent accidents.
9. Honeycomb Hexagon Shelf Arrangement
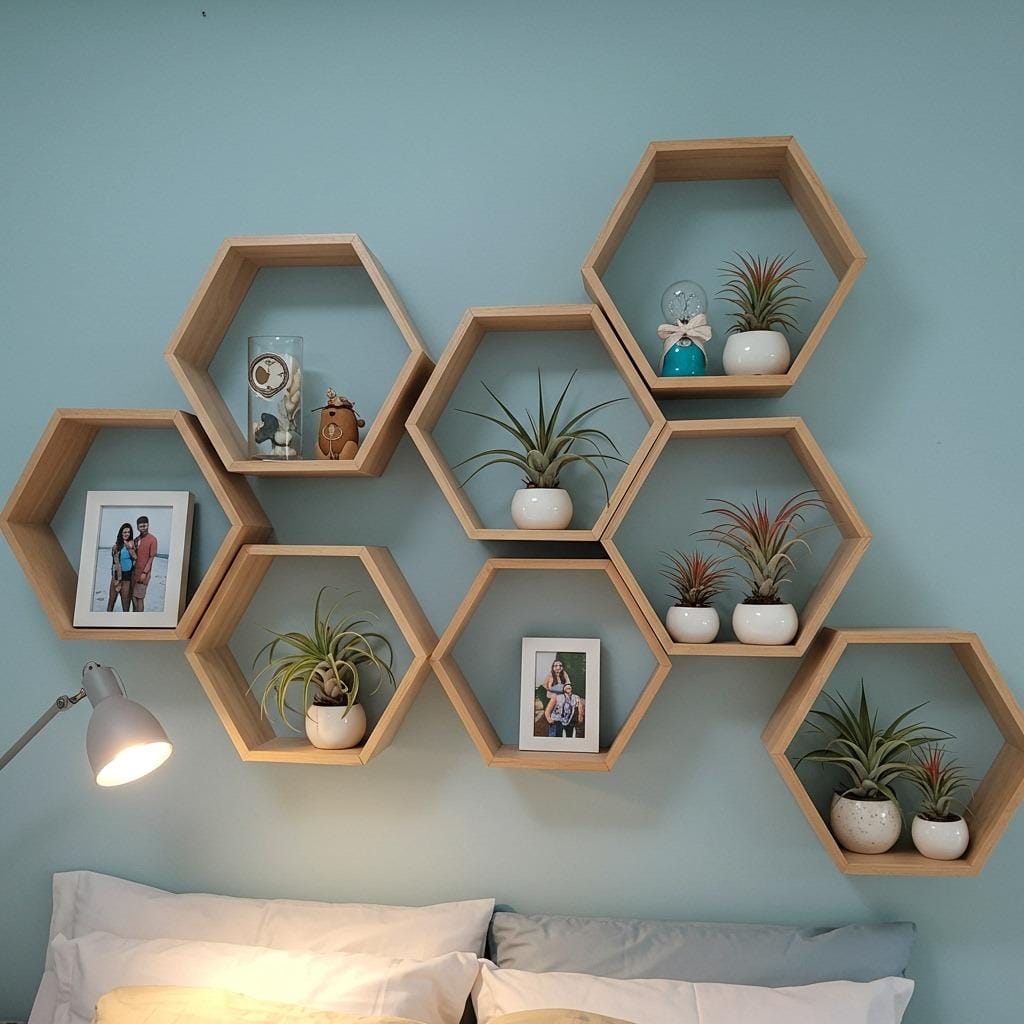
Hexagon shelves clustered together create geometric interest that flat rectangular shelves can’t match. The honeycomb arrangement feels modern and playful, breaking up the expected grid pattern most shelving follows. Each hexagon becomes its own little display vignette.
Cut the angles yourself with a miter saw or buy pre-made hexagon shelf kits online. Arrange them symmetrically for a planned look, or scatter them organically across the wall. The negative space between shapes matters as much as the shelves themselves in creating visual rhythm.
This floating shelf design works beautifully in kids’ rooms or creative spaces where you want something less serious. Fill each hexagon thoughtfully rather than cramming them full. A few carefully chosen objects in each compartment makes more impact than cluttered displays.
10. Stained Glass Window Frame Repurposed as Shelving
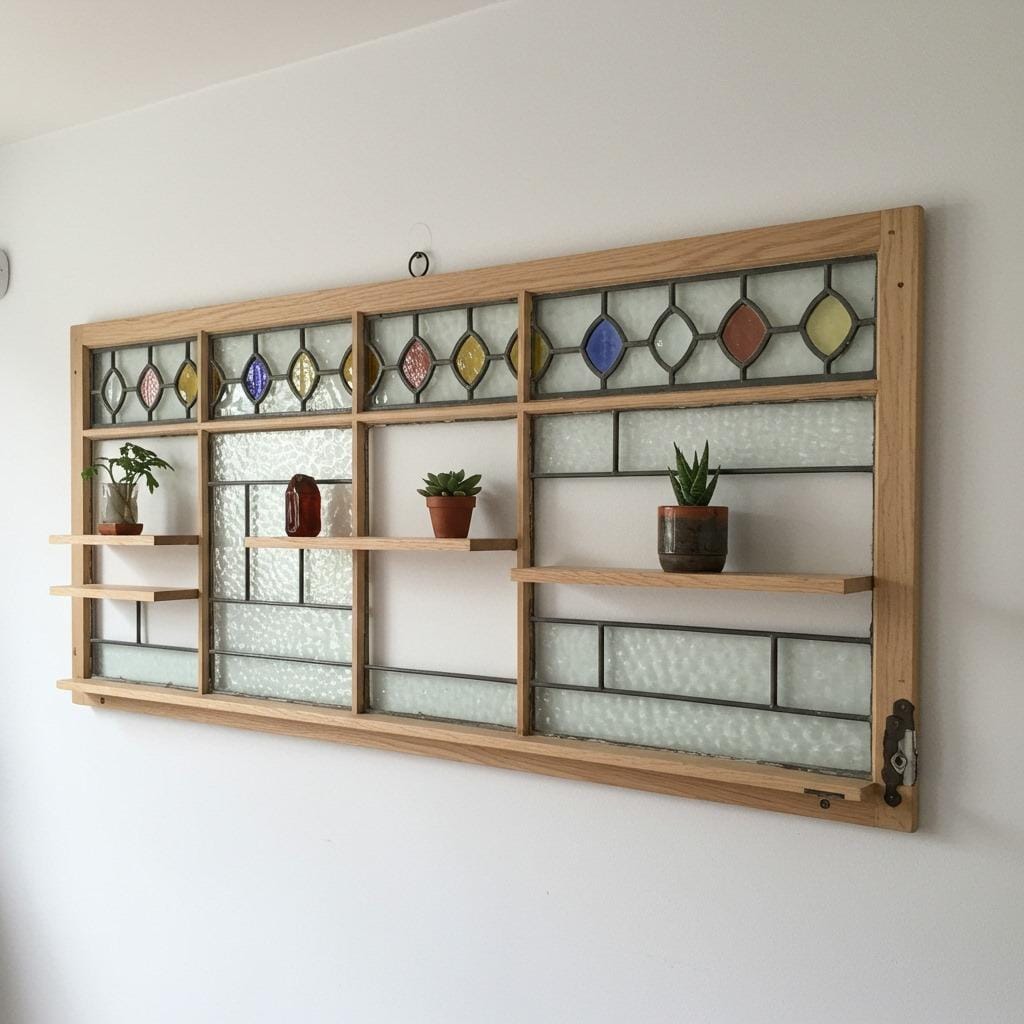
Old window frames, especially ones with decorative glass, become incredible shelf systems with a little creativity. Mount the frame flat against the wall, then add small shelves between the glass sections. The window provides structure and visual interest while the shelves handle actual storage.
This approach requires finding the right window frame, which might take some thrift store hunting. Look for frames with multiple panes that create natural compartments for shelving. The glass doesn’t need to be perfect, small cracks or chips add to the vintage charm.
These work as statement pieces rather than heavy-duty storage. Use them for lightweight decorative items, small plants, or collections you want to showcase. The combination of old glass and new shelving creates layers of interest that feel collected over time.
11. Ladder-Style Leaning Floating Shelves
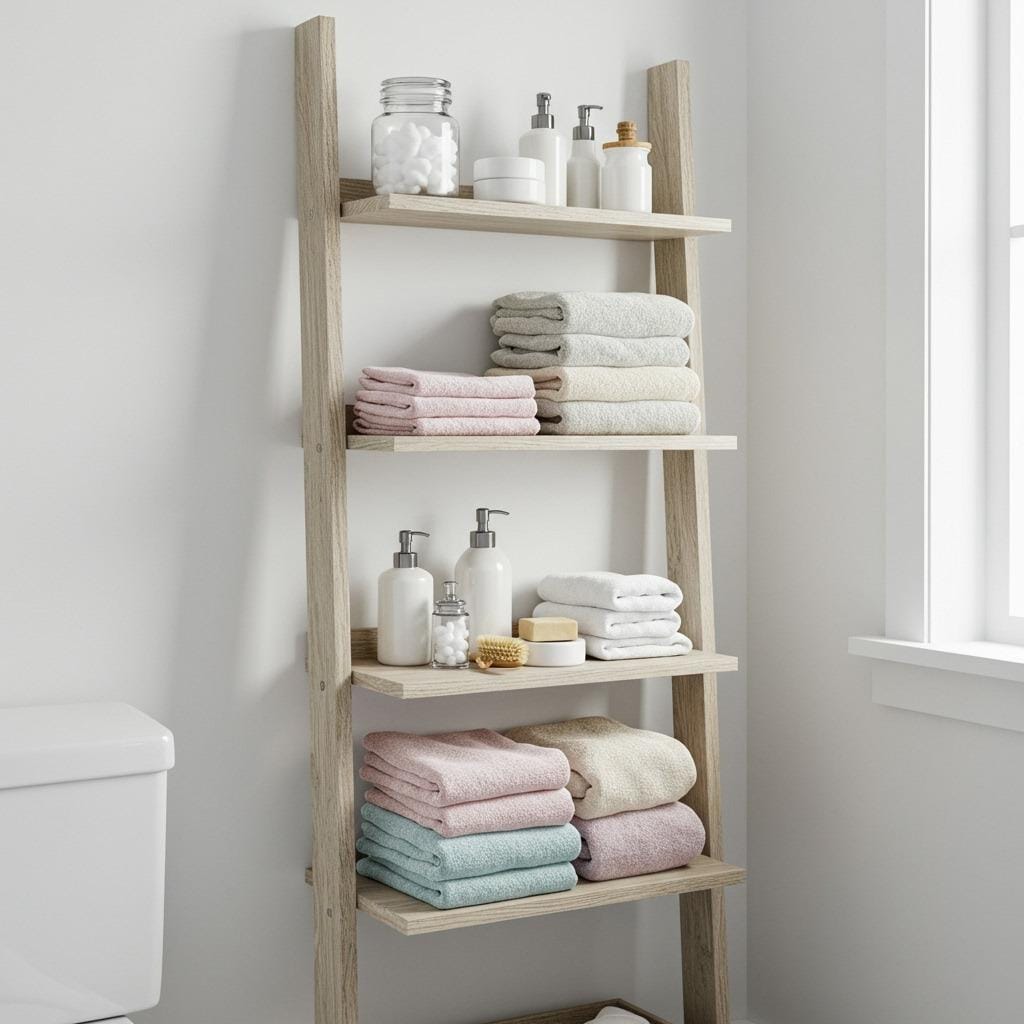
Leaning ladder shelves technically rest on the floor, but mounted versions use the ladder concept with true floating shelves. The shelves graduate in depth as they descend, creating a cascading effect that’s both practical and visually dynamic. Deeper shelves at the bottom handle bulkier items while upper shelves display smaller pieces.
The angled support pieces that define the ladder look can be functional or purely decorative. For true floating versions, mount each shelf independently but maintain that graduated depth pattern. The ladder sides attach to the wall as accent pieces that frame the shelving system.
This style works particularly well in bathrooms where you need varied storage depths. Towels fit on lower shelves while toiletries and decor occupy the upper levels. The open design keeps small bathrooms from feeling cramped despite adding substantial storage.
12. Box Frame Floating Shelves with Hidden Storage

Box frame shelves look like open cubes mounted to the wall, creating display space on all visible sides. Add backs to some cubes and install small doors to create hidden storage within the same system. This combination gives you both showcase space and concealed storage in one unified look.
Build them from 3/4-inch plywood or pine boards, creating boxes of varying sizes for visual interest. Mount the boxes at different depths from the wall so some protrude more than others. This layering adds dimension and prevents the arrangement from looking too flat.
These work brilliantly in entryways and mudrooms where you need some things visible (keys, mail) and other things hidden (dog leashes, chargers). The mix of open and closed storage keeps the wall from feeling cluttered while still being highly functional.
13. Floating Desk Shelf Combo for Small Home Offices

Combining your desk with floating shelves creates a complete workspace that uses minimal floor space. The desk surface mounts as one large floating shelf, with smaller shelves stacked above for supplies and reference materials. Everything you need stays within arm’s reach without requiring a bulky desk unit.
This setup transforms awkward nooks or unused wall sections into functional home office spaces. Mount the desk shelf at standard height (28-30 inches) and space upper shelves to accommodate your specific storage needs. Keyboard trays can attach underneath if you want the desk surface clear.
Cable management becomes easier since everything mounts directly to the wall. Run cords behind the desk shelf or use cable clips to keep them organized. The floating design makes cleaning underneath simple, and the whole setup can be removed without leaving a footprint if you move.
14. Metallic Floating Shelves with LED Strip Lighting
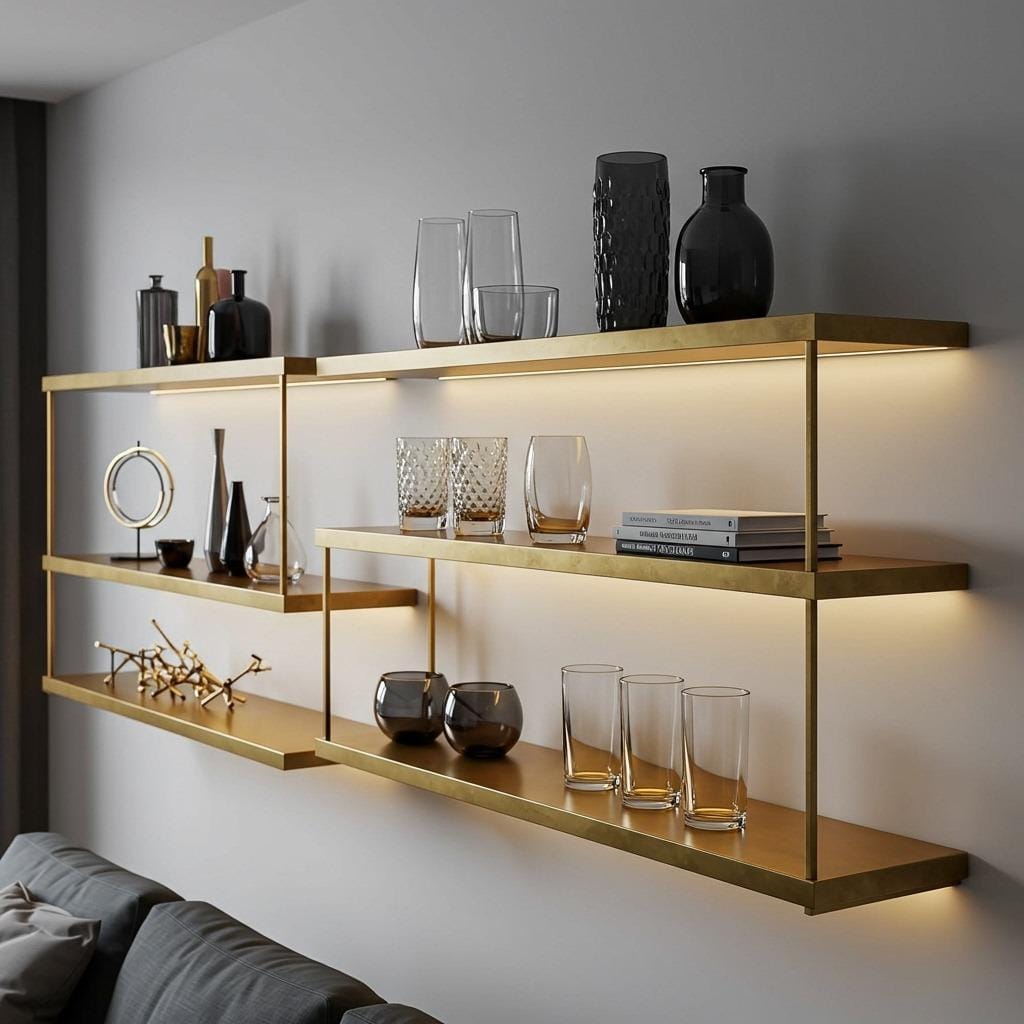
Metal shelves bring an entirely different aesthetic than wood, especially in brushed brass, copper, or matte black finishes. Add LED strip lighting along the underside to transform them from simple storage into illuminated displays. The light reflects off the metal and creates ambiance while highlighting whatever you’re showcasing.
Battery-powered or plug-in LED strips install easily and consume minimal energy. Cool white LEDs feel modern and crisp, while warm white creates a cozier glow. Some smart LED options let you change colors to match your mood or season.
These shelves work beautifully in living rooms for displaying glassware, collectibles, or books. The lighting adds a gallery-quality feel that elevates everyday objects. Just keep the displays somewhat curated since everything will be literally in the spotlight.
15. Recessed Floating Shelves Built Into Wall Thickness
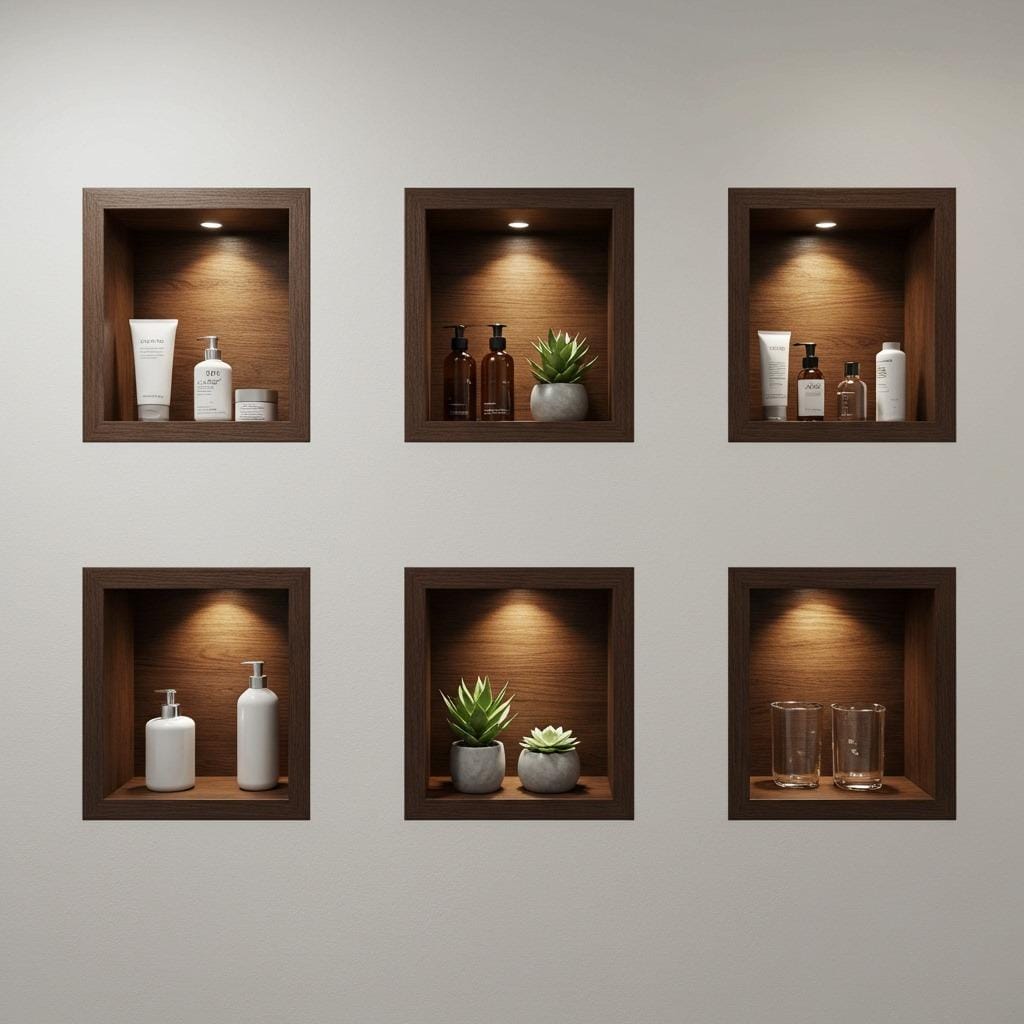
For the ultimate integrated look, build shelves into the wall cavity itself. This works when you’re already doing wall work or in rooms where you can access the stud bays. The shelves sit flush with or slightly recessed from the wall surface, creating shadow boxes that feel architectural rather than added.
This approach requires more construction knowledge since you’re cutting into drywall and working around studs. The payoff is storage that feels like it was always meant to be there. Tile around recessed bathroom shelves or add LED lighting to create glowing display niches.
These built-in shelves work best for smaller items since depth is limited by stud spacing (typically 3.5-5.5 inches). They’re perfect for bathroom storage where shampoo bottles, toiletries, and decor need homes without protruding into the room. The recessed design means no bumped elbows or knocked-over items.
Choosing the Right Wood and Materials
Not all wood works equally well for floating shelves. Pine is affordable and easy to work with, but it’s soft and can sag under heavy loads. Oak or maple provide more strength for longer spans, though they cost more and require sharper tools to cut cleanly.
Plywood gets overlooked but actually makes excellent shelves. Edge-banding hides the laminated layers, and the cross-grain construction resists warping better than solid wood. For painted shelves, plywood saves money without sacrificing quality since the grain won’t show anyway.
Consider your room’s humidity levels when choosing materials. Bathrooms and kitchens need sealed wood or composite materials that won’t warp from moisture exposure. Waterproof options include marine-grade plywood, sealed bamboo, or composite boards designed for wet areas.
Installation Tips for Secure Mounting
Finding studs is non-negotiable for floating shelves. Drywall alone can’t support weight, and eventually anchors will fail. Use a stud finder or the old knock-and-listen method to locate the solid wood behind your walls. If studs don’t line up with your desired shelf placement, install a mounting board horizontally between studs first.
Heavy-duty shelf brackets rated for your expected load provide peace of mind. Check weight ratings carefully and round up. If a bracket claims 50-pound capacity, treat it like it’ll hold 30 pounds comfortably. Better to over-engineer than to clean up a crashed shelf.
Level matters more than you think. Even slightly tilted shelves will drive you crazy once you notice, and items might slowly migrate to one end. Use a quality level during installation and double-check before tightening everything down. Small adjustments during mounting are much easier than fixing it later.
Styling Your Floating Shelves Without Clutter
The temptation to fill every inch of shelf space is real, but restraint creates better displays. Group items in odd numbers (three or five objects work better than two or four) and vary heights to create visual movement. Leave some empty space, it gives eyes a place to rest.
Mix functional items with decorative pieces so shelves feel purposeful rather than merely pretty. A stack of books you actually reference, a plant that needs the light, a bowl that holds daily essentials. When storage serves real needs while looking good, the styling feels effortless.
Rotate your displays seasonally to keep things fresh without buying new stuff. Those summer beach finds swap out for fall pinecones and winter evergreen clippings. This rhythm prevents your shelves from becoming stale background elements you stop noticing.
Budget-Friendly Building Strategies
New lumber gets expensive quickly, but alternatives exist if you’re willing to hunt. Check building material resale shops where new construction projects offload extras. Estate sales often include boards and supplies when workshops get cleared out.
Basic pine boards from big-box stores work fine for painted shelves. Focus your budget on quality mounting hardware rather than premium wood for projects where the grain won’t show. A well-mounted pine shelf beats a poorly secured oak shelf every time.
Start with one or two shelves rather than tackling an entire wall at once. This spreads the cost over time and lets you test your design before committing fully. You might discover you want deeper shelves or different spacing once you see how the first ones function.
Making Floating Shelves Work in Rentals
Floating shelves in rentals require planning around that eventual move-out inspection. Traditional mounting leaves holes that need patching, but damage can be minimized. Use the smallest screws that’ll safely hold your weight, and keep the spackle handy for repairs.
Some rentals prohibit wall mounting entirely, but removable options exist. Damage-free hanging strips rated for heavier weights can support lightweight floating shelves if you’re strategic. Just stay well under the weight limits and avoid the temptation to overload them.
Alternatively, lean shelves against walls rather than mounting them. Large bookshelf units can incorporate floating shelf aesthetics without permanent installation. When moving day comes, everything disassembles and goes with you to the next place.
Your walls hold more potential than you’re using. These DIY floating shelves prove that storage doesn’t have to be boring or eat up valuable floor space. Whether you go rustic with reclaimed wood or sleek with metallic finishes, the right shelves transform blank walls into hardworking, beautiful features. Pick one design that fits your skill level and start there. Once you see how much function and style floating shelves add, you’ll be planning your next installation before the first one’s even finished.
Sanjai creates easy, affordable home decor ideas that anyone can try. Through simple tips and curated finds, he helps you style rooms you’ll love coming home to.