You know that feeling when you’re rushing to make breakfast and you can’t find the cereal bowl? Or when you buy duplicates of spices because you forgot you already had them buried in the back of a cabinet?
Kitchen cabinets have this sneaky way of turning into chaotic black holes. But here’s the thing – organizing them doesn’t require buying every fancy gadget on the market or spending an entire weekend color-coding everything.
What if you could open any cabinet and immediately spot what you need? I’m talking about a system that actually works for real life, not just for the Instagram photo. The kind of setup that saves you time, reduces food waste, and maybe even makes cooking feel a little less stressful.
Why Most Kitchen Cabinet Systems Fail (and How to Fix It)
Most people organize their cabinets once, feel great about it for two weeks, and then watch everything slowly collapse back into chaos. Sound familiar?
The problem isn’t you. It’s that most organizing advice ignores how kitchens actually function. You need a system that works with your habits, not against them. If you constantly use your coffee mug, it shouldn’t be on the top shelf behind the fancy china you use twice a year.
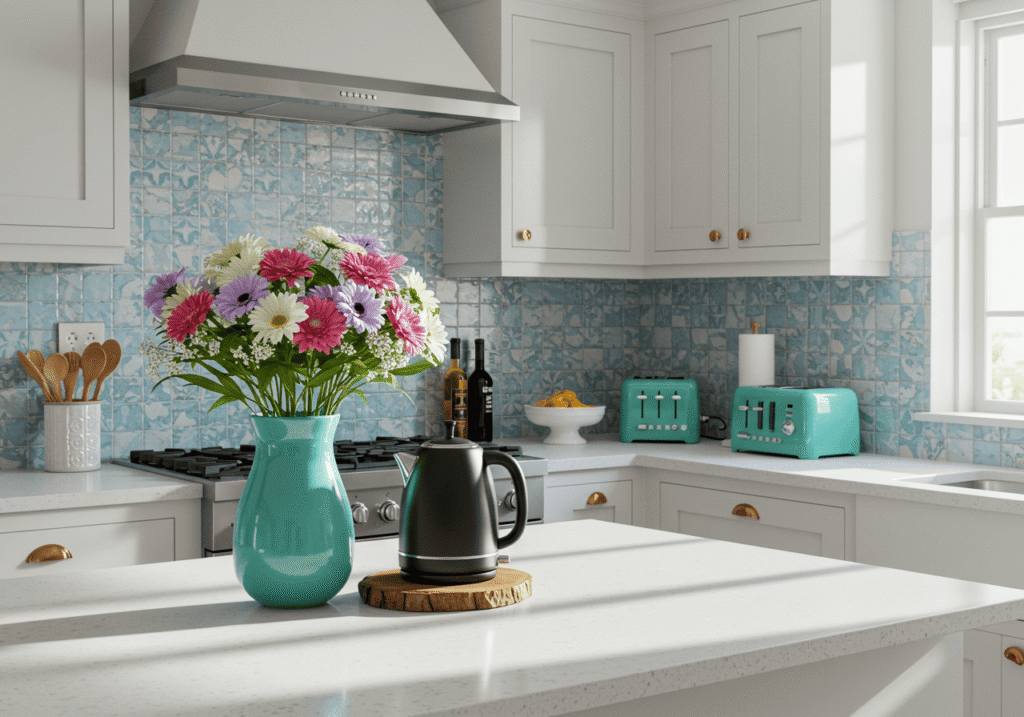
Think about how you move through your kitchen. Where do you stand when you unload groceries? Which cabinet is closest to the stove? These small details matter more than perfectly matching containers. A good storage system should feel almost invisible – you shouldn’t have to think about where things go.
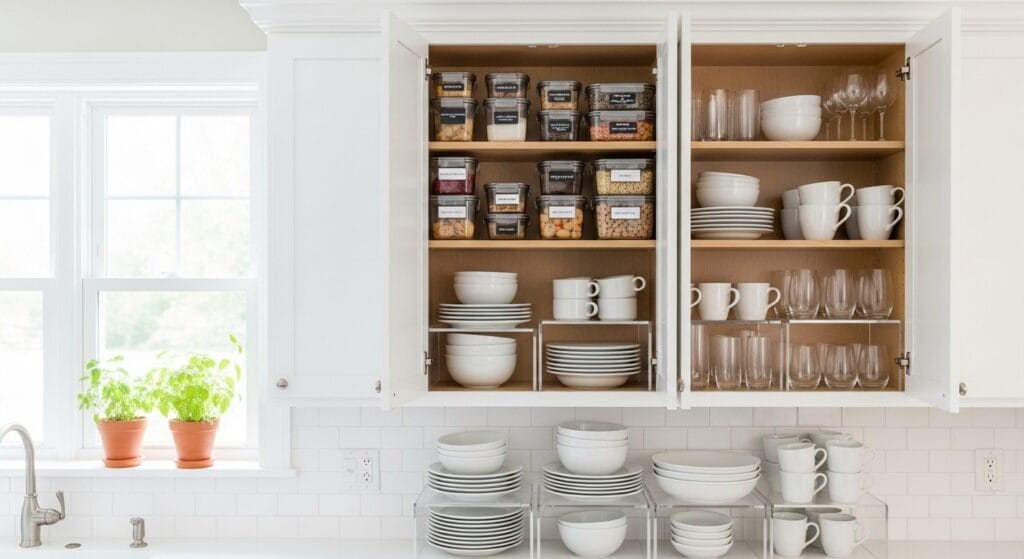
Step 1: Empty Everything and Be Honest About What You Actually Use

This is the part nobody wants to do, but it makes everything else easier. Pull everything out of your cabinets. Yes, everything. Those mystery Tupperware lids, the blender you haven’t touched in three years, all of it.
Lay it all out on your counters or kitchen table. You might be shocked by how many duplicate items you’ve accumulated. I once found four cheese graters in one kitchen – turns out the owner kept buying new ones because she could never find the ones she already had.
Sort items into three categories: use regularly, use occasionally, and haven’t touched in over a year. Be ruthless with that last category. If you’re keeping something “just in case,” ask yourself when that case might realistically happen. This declutter process creates the breathing room your cabinets desperately need.
Step 2: Group Items by Category and Frequency of Use
Now that you can see everything you own, it’s time to think strategically. Group similar items together – all baking supplies in one zone, all breakfast items in another, all pots and pans together.
But here’s where it gets interesting. Within each category, separate items by how often you use them. Your everyday coffee mugs should be more accessible than the fancy teacups you break out for special occasions. The pasta you cook weekly deserves prime real estate compared to that specialty flour you use twice a year.
This is also when you want to consider your kitchen storage ideas and what tools might help. Notice you have tons of spices? You’ll need a different solution than someone with mostly canned goods. See a mountain of plastic containers? Time to think about drawer dividers or stackable organizers.
Step 3: Assign Zones Based on Your Kitchen Workflow

Your kitchen has natural work zones, and your storage should reflect that. The area near your stove is your cooking zone – that’s where oils, spices, and frequently used pots belong. The space near your fridge is perfect for food storage containers and lunch-packing supplies.
Upper cabinets near the coffee maker? That’s your beverage station – mugs, tea, coffee supplies, and maybe your everyday glasses. Lower cabinets by the dishwasher should hold dishes and bowls since that’s where you’ll naturally want to put them away. If you’re working with a small kitchen cabinet organization challenge, these zones become even more critical.
Don’t fight against your natural habits. If you always grab plates from a certain spot, that’s where plates should live. The goal is to make putting things away feel as natural as taking them out. When everything has a logical home, maintaining organization becomes almost effortless.
Step 4: Maximize Vertical Space with Smart Cabinet Organizers
Most cabinets have way more vertical space than people use. That gap between your dinner plates and the shelf above? Wasted space. The six inches of emptiness above your canned goods? You’re missing out on valuable storage.
Shelf risers are absolute lifesavers here. They let you stack items in tiers so you can actually see what’s in the back. I’m particularly fond of expandable ones that adjust to fit your cabinet width. For pantry and cabinet systems, stackable bins work wonders for corralling smaller items like snack bags or seasoning packets.
Lazy Susans aren’t just for condiments, though they’re fantastic for that too. Use them in corner cabinets where items typically disappear into a black hole. Suddenly those awkward deep cabinets become accessible real estate. Pull-down shelving or tiered organizers can turn those upper cabinets you can barely reach into functional storage. The Container Store’s organizational systems offer plenty of inspiration for maximizing every inch.
Step 5: Use Clear Containers and Labels for Pantry Items

Here’s something that genuinely changed how I cook – transferring pantry staples into clear, airtight containers. You can instantly see when you’re running low on flour or rice, which means fewer emergency grocery runs.
But the real magic happens when you add labels. Not the fancy calligraphy kind (unless that’s your thing), just clear, readable labels that tell you what’s inside and maybe when it expires. This simple step eliminates the guessing game and keeps you from accidentally using salt when you meant to grab sugar.
Choose containers that fit your actual storage space. Measure your shelves before buying anything. Square or rectangular containers use space more efficiently than round ones. And if you’re dealing with kitchen pantry storage hacks, matching container sizes mean you can stack them neatly without wasting gaps between items.
Step 6: Create Pull-Out Drawer Solutions for Deep Cabinets
Deep lower cabinets are both a blessing and a curse. Sure, they hold a lot, but finding anything past the front row feels like an archaeological dig. Pull-out drawers or sliding shelves solve this problem beautifully.
You can install sliding cabinet organizers yourself without too much hassle. They’re essentially drawers that pull out smoothly so you can see and reach everything stored in the back. No more getting on your hands and knees with a flashlight trying to locate that waffle maker.
For pots and pans, consider vertical dividers that let you store them on their sides like files in a filing cabinet. This approach works especially well in lower cabinets and makes grabbing the right pan so much faster. Some people swear by pegboard systems inside cabinets too – they’re customizable and surprisingly sturdy for hanging frequently used items.
Step 7: Organize Under-Sink Cabinets with Tiered Storage
The cabinet under your sink probably looks like a tornado hit it, right? That weird plumbing creates awkward angles, and somehow cleaning supplies always end up in a jumbled mess.
Start by using an expandable under-sink organizer that fits around the plumbing. These typically have two tiers and adjustable shelves. Store your most-used cleaning products on the top tier where they’re easy to grab. Less frequently used items go below or in pull-out caddies.
Consider adding a tension rod across the cabinet to hang spray bottles by their triggers. This frees up floor space and keeps them organized and accessible. For sponges, dish soap, and scrub brushes, a small caddy that sits on the edge of the sink or mounts to the cabinet door keeps these daily essentials within arm’s reach. Check out more under-sink storage solutions that actually work in real kitchens.
Step 8: Install Door-Mounted Organizers for Lids and Small Items

Cabinet doors are prime real estate that most people completely ignore. Those flat surfaces are perfect for mounting storage solutions that keep small, annoying items organized.
Over-the-door organizers work great for pot and pan lids, which otherwise take up way too much space and never seem to match the pot you’re looking for. You can also mount shallow baskets or racks for things like aluminum foil, plastic wrap, and sandwich bags.
Spice racks mounted to the inside of cabinet doors keep seasonings visible and accessible. Some people even mount small bins for storing measuring cups and spoons. Just make sure whatever you add doesn’t interfere with the shelves when you close the door. This is one of those simple kitchen styling tricks that makes a surprising difference in daily functionality.
Step 9: Maintain Your System with a 5-Minute Daily Reset
The best organizing system in the world falls apart without maintenance. But here’s the good news – you don’t need to spend hours keeping things tidy. A quick five-minute reset at the end of each day does wonders.
Before bed or after dinner cleanup, do a quick scan of your counters and cabinets. Put stray items back in their designated homes. Wipe down a shelf if you notice crumbs. Straighten containers that got pushed around during the day.
This tiny habit prevents the slow slide back into chaos. When everything has a clear home and you consistently put things back, organization maintains itself. Get your family involved too – if everyone knows where things go, everyone can help keep the system running smoothly.
Common Kitchen Cabinet Organization Mistakes to Avoid
Don’t buy a bunch of organizing products before you declutter. I’ve seen so many people invest in expensive systems only to realize they don’t actually need half of them once they pare down their belongings. Empty and sort first, then shop.
Avoid storing heavy items in upper cabinets. Not only is it a safety issue, but you’re also making daily tasks harder than they need to be. Heavy pots, small appliances, and bulk items belong in lower cabinets where they’re easier to lift and less likely to cause injury if dropped.
Stop trying to organize everything at once. Tackle one cabinet at a time over several days or weeks. This approach feels less overwhelming and lets you actually maintain each section as you go. Plus, you can test what works before committing to an entire kitchen makeover.
Transform Your Kitchen into a Functional Space You Actually Enjoy
When your kitchen cabinets are properly organized, cooking stops feeling like a scavenger hunt. You’ll spend less time searching and more time actually preparing meals. That morning coffee routine becomes smoother when you’re not wrestling with a cabinet avalanche.
The mental clarity that comes with an organized kitchen is real. There’s something calming about opening a cabinet and seeing exactly what you have, where it is, and knowing you can find it again tomorrow. It’s one less source of daily friction in an already busy life.
Start with just one cabinet this weekend. Pick the one that frustrates you most – maybe it’s where you store food containers, or perhaps it’s that corner cabinet where things go to disappear. Apply these steps to that single space and see how it changes your kitchen experience. Once you feel the difference, you’ll want to organize the rest.
Sanjai creates easy, affordable home decor ideas that anyone can try. Through simple tips and curated finds, he helps you style rooms you’ll love coming home to.