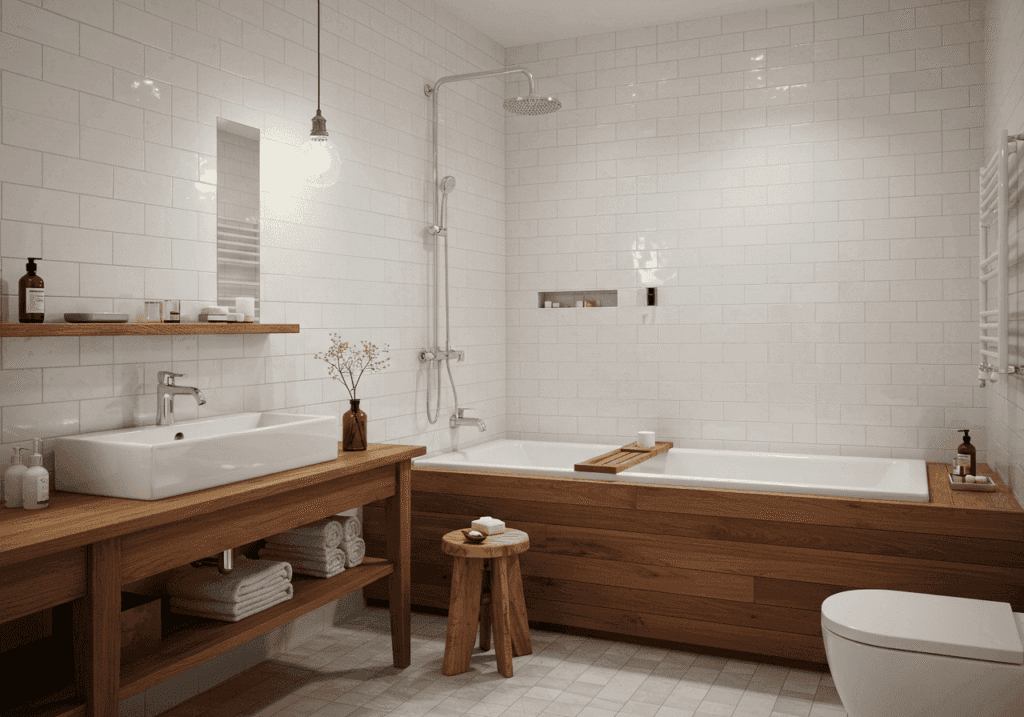
You know that feeling when you walk into your bathroom and cringe a little? Maybe it’s the builder-grade brass fixtures or the honey oak cabinets screaming 2005. The good news is that a dated bathroom doesn’t require gutting everything down to the studs.
With some strategic weekend swaps, you can transform the space without touching plumbing or hiring contractors. I’m talking about changes you can make between Saturday morning coffee and Sunday evening without breaking the bank. Let’s walk through exactly how to refresh a dated bathroom using smart, high-impact updates that’ll make you actually enjoy your morning routine again.
Why Quick Updates Work Better Than You Think
Here’s something most renovation blogs won’t tell you upfront. Not every outdated bathroom needs a full remodel to feel current. Sometimes the bones are perfectly fine, but the finishes are what’s aging the space.
Paint, hardware, and textiles can shift the entire mood of a room faster than you’d expect. When you swap out the shiny brass for matte black or brushed nickel, suddenly those builder-grade cabinets look intentional instead of cheap. A fresh coat of paint in the right shade can make yellowed walls feel spa-like again.
The beauty of focusing on quick bathroom makeover strategies is that you’re not committed forever. If you try a navy vanity and hate it, repainting takes an afternoon. Compare that to ripping out tile you regret, and the stakes feel much lower. These smaller projects also help you figure out what you actually want before investing in permanent changes.
Assess What’s Actually Making Your Bathroom Look Dated
Before you start buying paint samples, take a hard look at what’s bothering you. Is it the lighting casting unflattering shadows? The mismatched metal finishes? The cluttered countertop with every product visible?
Sometimes it’s not one big issue but a combination of small outdated elements. Brass handles paired with chrome faucets and an oil-rubbed bronze towel bar creates visual chaos. Flip through photos of bathrooms you love and identify patterns in what appeals to you.
Make a list of the top three things that feel most dated to you personally. This helps you prioritize where to spend your time and budget during your weekend bathroom project. You might realize the vanity itself is fine, but the countertop clutter and outdated mirror are doing most of the damage.
1. Paint Your Vanity for an Instant Facelift
If your bathroom vanity is structurally sound but aesthetically stuck in another decade, paint changes everything. You don’t need to be a professional to paint a bathroom vanity successfully, just patient enough to prep and prime properly.
Start by removing all hardware and doors. Clean everything thoroughly with a degreaser, then lightly sand to help the paint adhere. A bonding primer is non-negotiable here since bathroom cabinets face moisture and daily use. Skip this step and you’ll have chipping paint within weeks.
For color, soft neutrals like greige, pale sage, or warm white feel current without being trendy. If you’re braver, deep charcoal or navy creates a moody, sophisticated vibe. Just make sure your lighting can handle darker colors, or the space might feel cave-like. Two thin coats of quality cabinet paint, plus a protective topcoat, and you’ve got a vanity that looks custom for under $50.
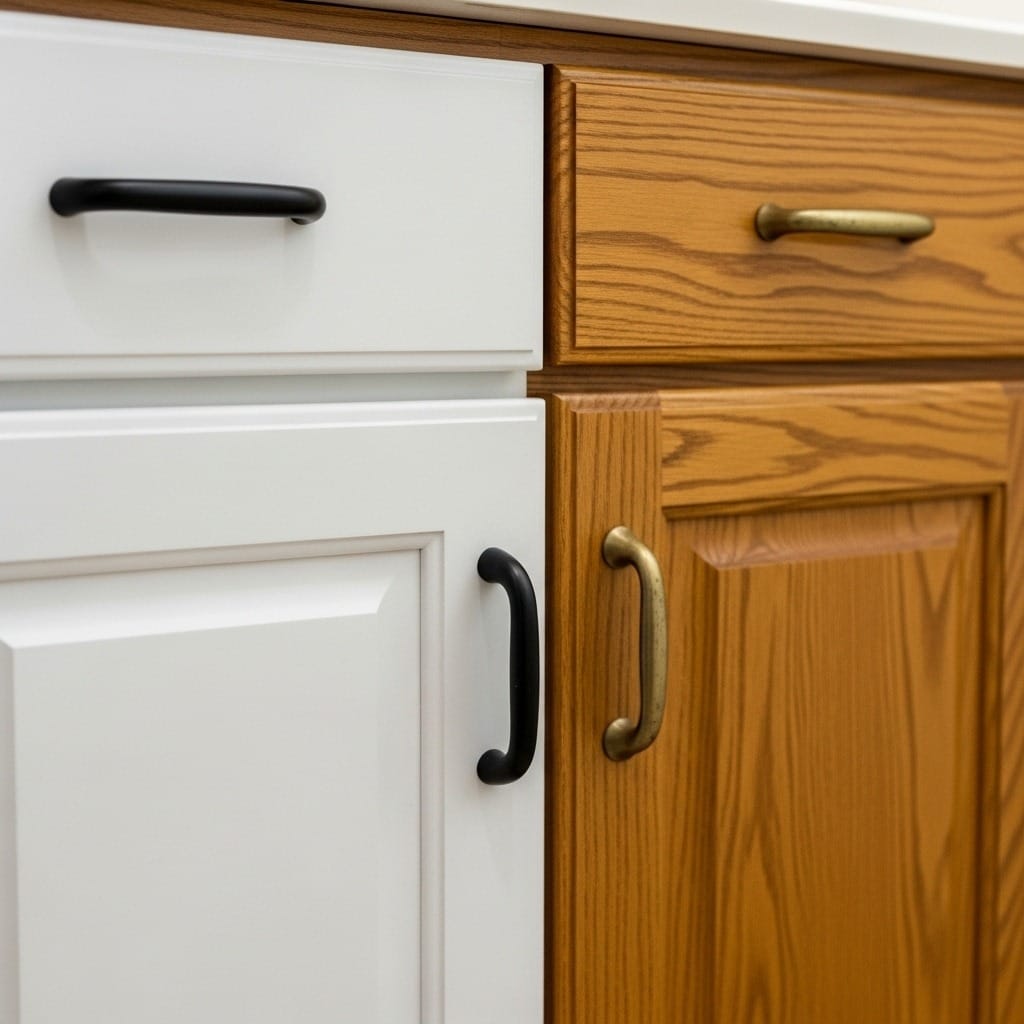
2. Swap Out All the Hardware and Fixtures
This is probably the fastest way to modernize a bathroom, and it requires zero painting or permanent changes. Replacing cabinet hardware, towel bars, toilet paper holders, and light fixtures creates instant cohesion.
Choose one finish and stick with it throughout the entire bathroom. Matte black feels modern and hides water spots beautifully. Brushed nickel or brass (the modern kind, not the 1990s version) adds warmth. Chrome still works if you want something crisp and classic, though it shows fingerprints more readily.
You’ll need a screwdriver and maybe a drill if new hardware doesn’t line up with existing holes. Most towel bars and toilet paper holders mount with basic hardware included. If you’re replacing light fixtures, turn off the power at the breaker first. This entire swap can happen in a few hours and makes a difference you’ll notice every single time you walk into the bathroom.
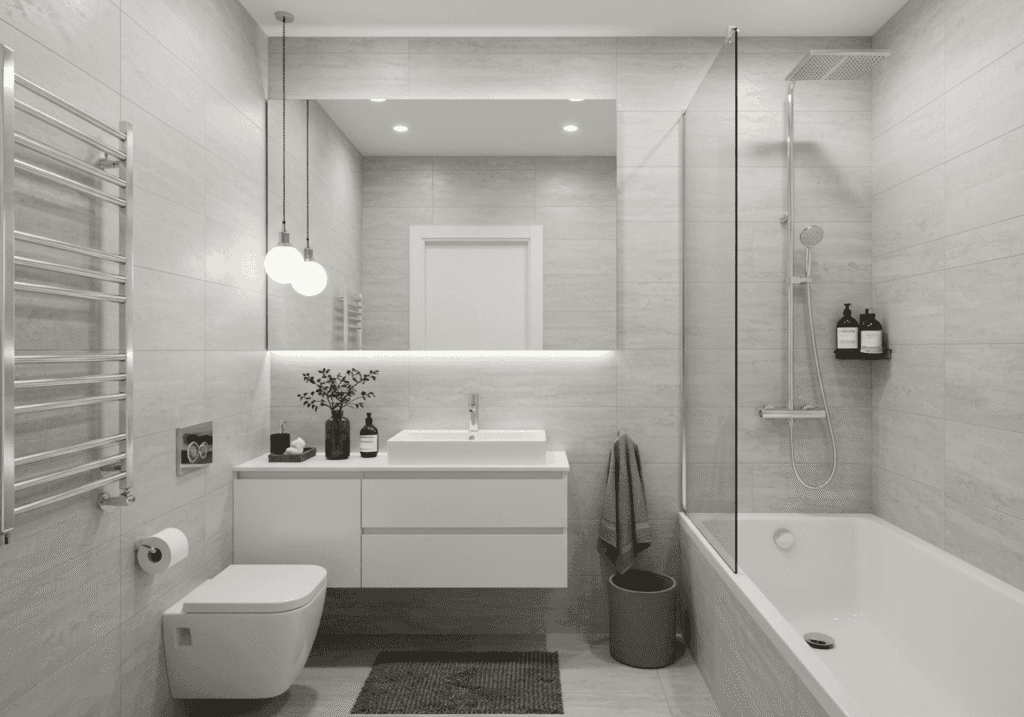
3. Update Lighting to Change the Entire Mood
Bad lighting makes everything look worse, including you. Those builder-grade dome lights or vertical vanity strips with exposed bulbs aren’t doing anyone favors. Modern bathroom lighting should be layered and flattering, not institutional.
For vanity lighting, look for fixtures that direct light at your face rather than creating shadows. Sconces mounted at eye level on either side of the mirror work better than a single bar above it. If side mounting isn’t possible, choose a horizontal fixture with multiple bulbs to spread light evenly.
Don’t forget about bulb temperature either. Warm white (around 3000K) feels more flattering than cool daylight bulbs that make everything look clinical. If your bathroom lacks natural light, consider adding a small lamp on a shelf or upgrading to a backlit mirror. Good bathroom vanity lighting transforms the functionality of the space as much as the aesthetics.
4. Replace or Reframe Your Mirror
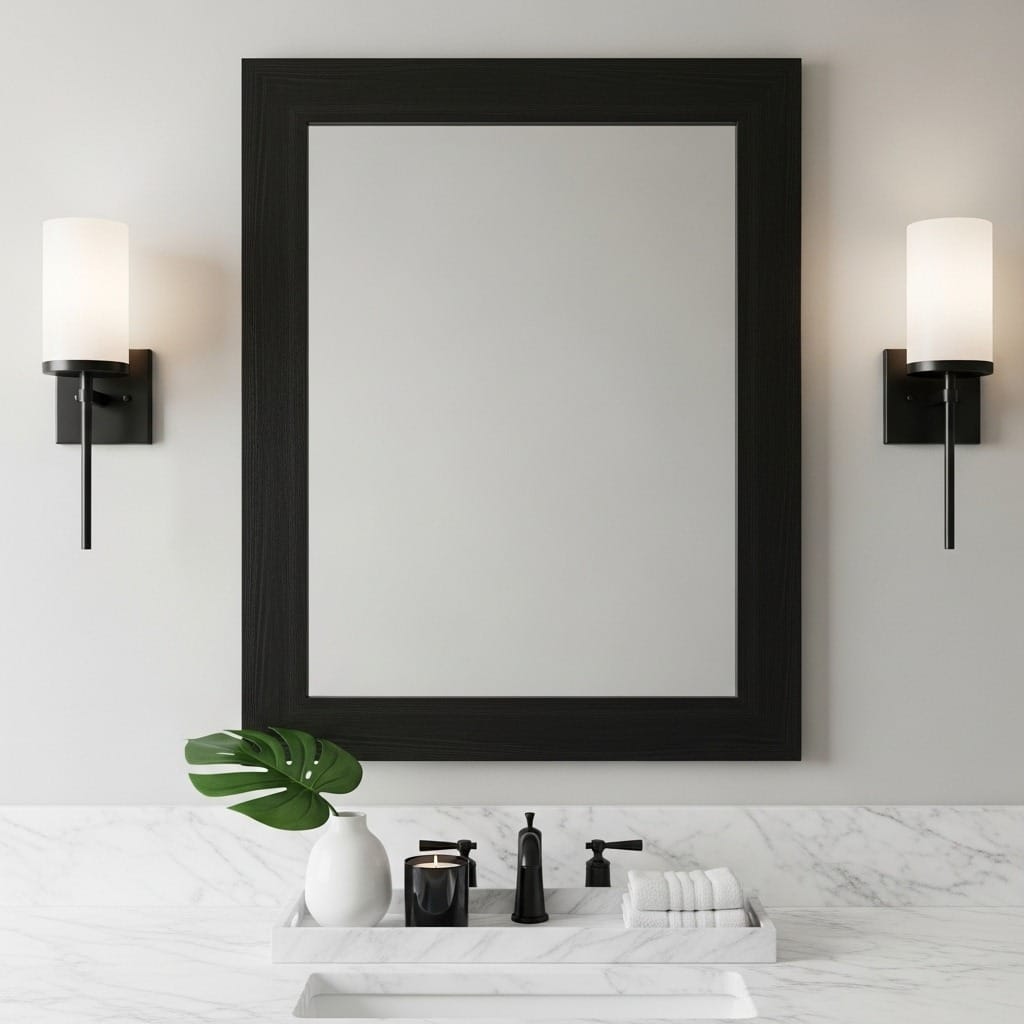
A basic builder-grade mirror doesn’t have to stay that way. You can either replace it entirely with a framed mirror or medicine cabinet, or frame the existing mirror to give it more presence.
Framing an existing mirror is surprisingly straightforward. You can buy affordable mirror frame kits online that adhere directly to the glass, or DIY one with trim pieces from the hardware store. Make sure whatever you choose complements your new hardware finish – a black frame with black fixtures creates a cohesive look.
If you’re replacing the mirror completely, consider going slightly larger or changing the shape. A round mirror softens the hard lines most bathrooms have, while an arched mirror adds architectural interest. Mounting a new mirror typically just requires finding the studs and using appropriate anchors for the weight.
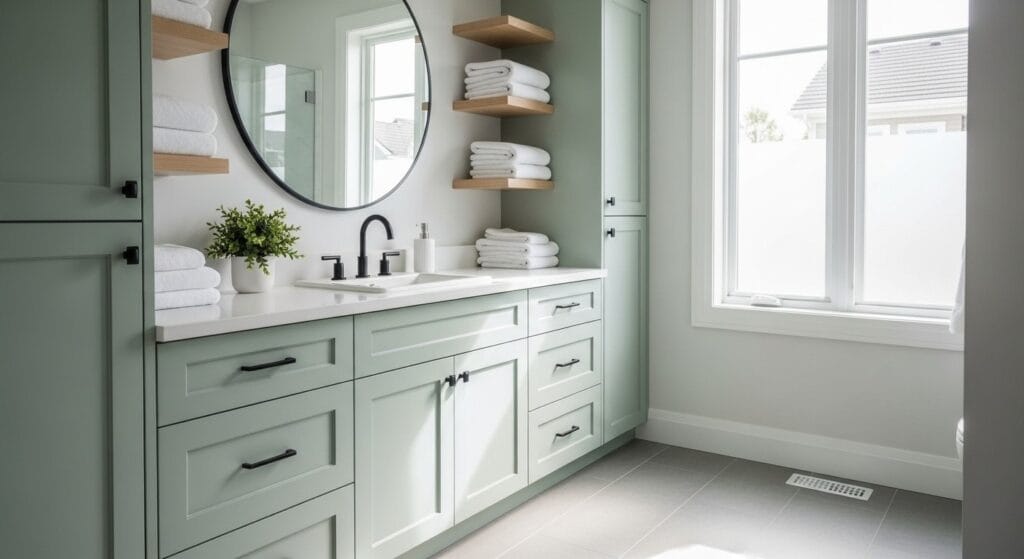
5. Add Storage That Doesn’t Require Construction
Clutter makes any space feel dated and chaotic. If your bathroom lacks adequate storage, you’re probably leaving products on the counter or stuffing things into an overflowing vanity. Visible storage solutions can actually enhance your design while solving practical problems.
Floating shelves add storage without taking up floor space, and they’re perfect for displaying folded towels, plants, or decorative containers holding daily essentials. Install them above the toilet, beside the vanity, or even in an empty wall space. Just make sure they’re properly anchored since bathrooms deal with humidity.
Baskets, canisters, and trays corral smaller items while looking intentional. A bathroom countertop tray keeps everyday products contained instead of scattered. Under-sink organizers maximize that awkward space around plumbing. Even a simple ladder shelf leaning against the wall provides vertical storage without permanent installation.
6. Rethink Your Textiles and Accessories
This might sound too simple to matter, but dated towels, rugs, and shower curtains drag down the whole space. If yours are thin, faded, or covered in outdated patterns, replacing them creates an immediate visual shift.
Choose textiles that complement your new color scheme. White or light gray towels feel spa-like and are easy to keep clean. A textured bath mat adds subtle interest without overwhelming. If you’re keeping a shower curtain, linen or waffle-weave fabric versions look more elevated than plastic or busy patterns.
Accessories matter more than you’d think too. Swap that plastic soap dispenser for a glass or ceramic one. Replace a flimsy shower caddy with a sleek metal one or built-in niches if you’re renovating. Even your trash can contributes to the overall aesthetic – a simple metal or wood one looks more polished than visible plastic.
7. Introduce Greenery and Natural Elements

Plants aren’t just trendy – they actually thrive in bathrooms thanks to the humidity. Adding greenery instantly makes the space feel fresher and more inviting. You don’t need a green thumb, just a few low-maintenance varieties.
Pothos, snake plants, and ZZ plants all tolerate low light and irregular watering. If your bathroom has a window, you could even try ferns or orchids. Place them on shelves, the back of the toilet, or hanging in a corner. Just make sure pots have drainage or you use a decorative outer pot to catch water.
Beyond plants, natural materials warm up bathrooms that feel too sterile. A wooden stool, woven basket, or bamboo accessories add texture. Stone or ceramic containers feel more substantial than plastic. These elements connect the space to nature, which is part of what makes high-end spa-inspired bathrooms feel so calming.
8. Address the Little Details That Age a Space
Sometimes it’s the smallest things that scream “dated.” Cracked caulk, rusty vent covers, yellowed light switch plates, or a toilet handle that barely works. These details seem minor until you fix them, and then the whole space feels more cared for.
Recaulking around the tub, sink, and baseboards is tedious but transformative. Remove old caulk completely, clean the area, and apply fresh white caulk for crisp, clean lines. It takes an afternoon but makes everything look newer.
Replace outlet covers and light switch plates with something current. Swap old towel hooks for new ones that match your hardware. If your toilet handle is dingy or broken, a $10 replacement takes five minutes to install. Tighten any loose faucets, cabinet doors, or drawer pulls. According to homeowner renovation spending statistics, attention to these finishing touches separates a DIY project from a professional-looking result.
What to Skip (At Least for Now)
Not everything needs to change during a weekend refresh. Some updates require more time, skill, or budget than a quick makeover allows. Knowing what to leave alone helps you stay focused and finish the project.
Tile work is usually best left for another time unless you’re just doing peel-and-stick accents. Replacing flooring involves moving the toilet and vanity, which pushes you beyond weekend territory. Major plumbing changes or moving fixtures definitely aren’t DIY weekend projects.
If your layout itself is problematic – like the door swinging into the vanity or no counter space at all – budget bathroom updates with cosmetic changes will only take you so far. But if the bones are good and it’s just the finishes that feel off, you’d be surprised what paint, hardware, and intentional styling can accomplish.
Making Your Changes Feel Cohesive
The difference between a bathroom that feels refreshed and one that just looks like you changed random things? Cohesion. Every choice should work together toward the same overall vibe you’re going for.
Pick a simple color palette and stick to it. Maybe that’s white, black, and natural wood. Or soft gray with warm brass accents. Three colors or finishes is usually plenty – more than that and things start feeling busy. Your new hardware, mirror frame, light fixtures, and accessories should all play nicely together.
Think about the mood you want to create. Is it minimal and modern? Warm and rustic? Coastal and airy? Every decision from paint color to towel texture should support that vision. Look at inspiration photos you’ve saved and notice what they have in common. That’s your roadmap for creating a bathroom that feels intentional instead of randomly updated.
A dated bathroom doesn’t have to stay that way until you can afford a full renovation. These weekend-friendly swaps prove that paint and hardware changes, combined with thoughtful styling, can bridge the gap between “stuck in 2005” and “exactly where I want to be.”
The best part? You can tackle these projects one weekend at a time if you want. Paint the vanity this month, update hardware next month, and gradually work through the list. Or power through everything in one ambitious weekend and enjoy the transformation immediately. Either way, you’re creating a bathroom that feels current, intentional, and completely yours – no contractor required.
Sanjai creates easy, affordable home decor ideas that anyone can try. Through simple tips and curated finds, he helps you style rooms you’ll love coming home to.